.svg)
Ask members to confirm or decline each roster you publish, then see on the roster who has answered.
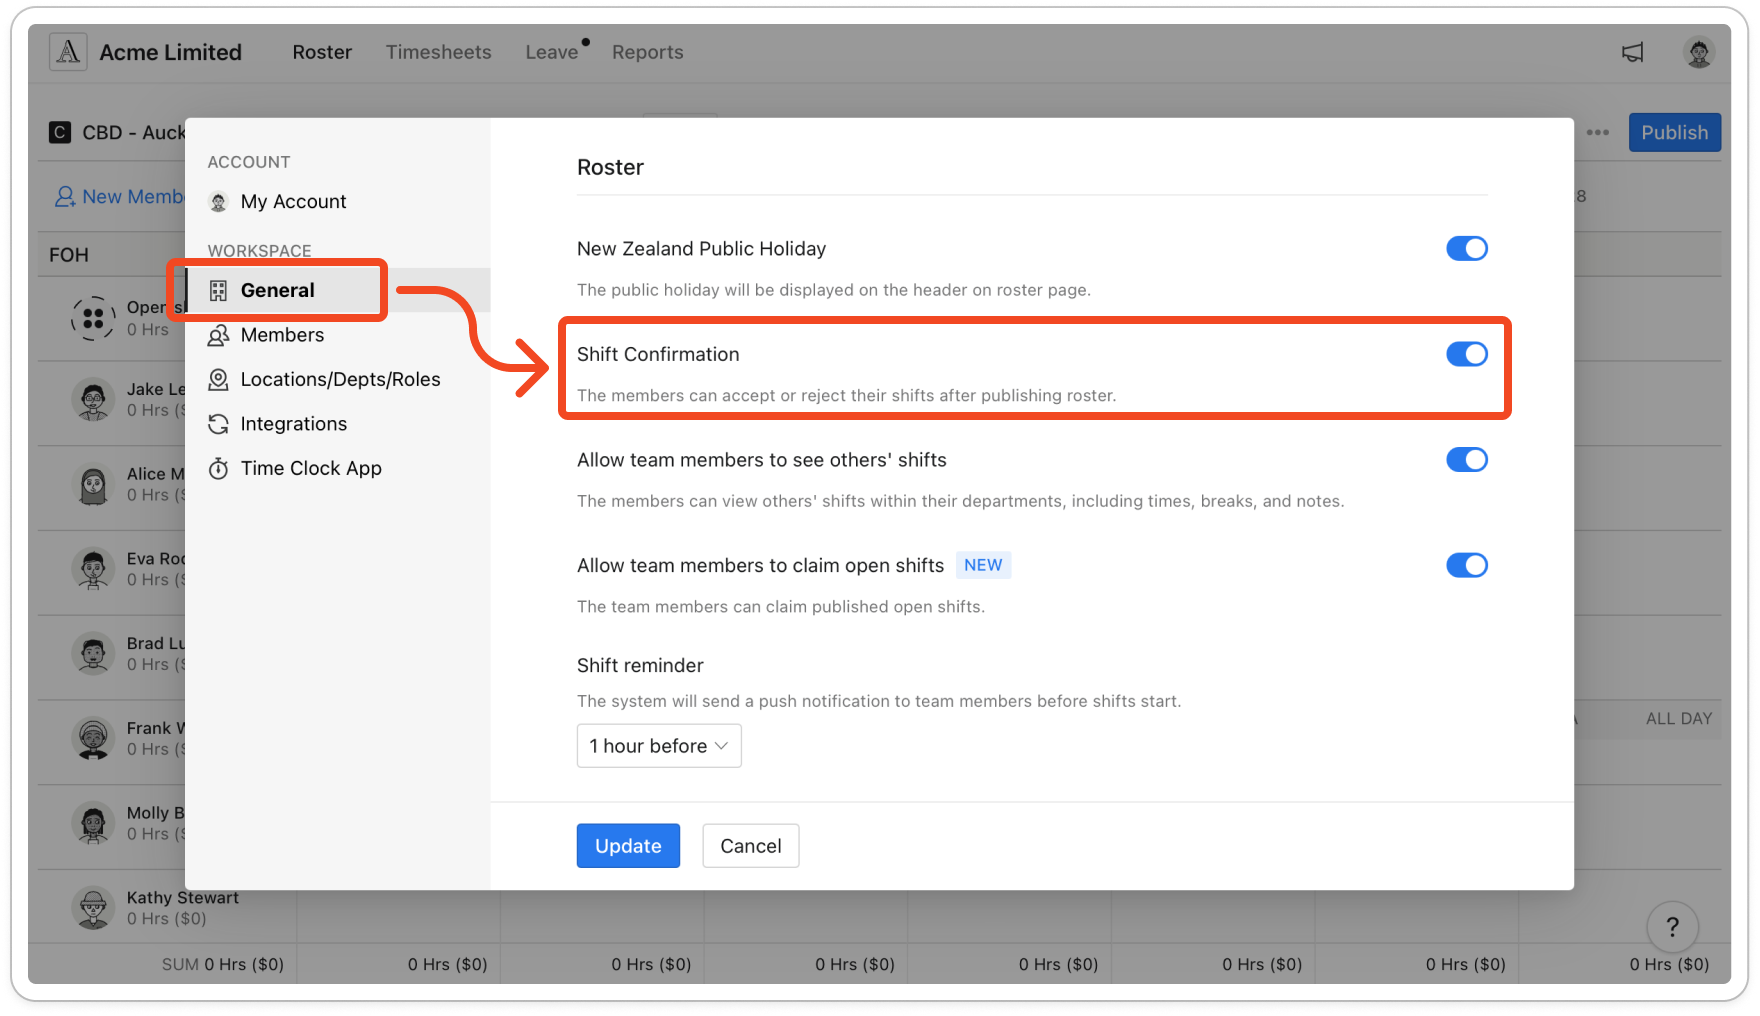
- Click your profile picture in the top right, then click Settings.
- Click General.
- Under Roster, turn on Shift Confirmation.
Note: Shift confirmation isn't on every plan. If yours doesn't include it, you see an upgrade badge next to its name instead of a switch.
- Click Update.
- Publish your roster with Notify by email ticked. Each member's roster email has a link to confirm and a link to decline.
Important: A member answers for a whole period, not shift by shift. One click on an email link answers for every shift in that email, and there is no way to accept some and decline others.
Tip: Members can also answer in the mobile app. On the Roster tab they tap Confirm shifts..., then Confirm or Decline, which answers for every shift in the dates on screen. This is also the only way to change an answer, because an email link works once.
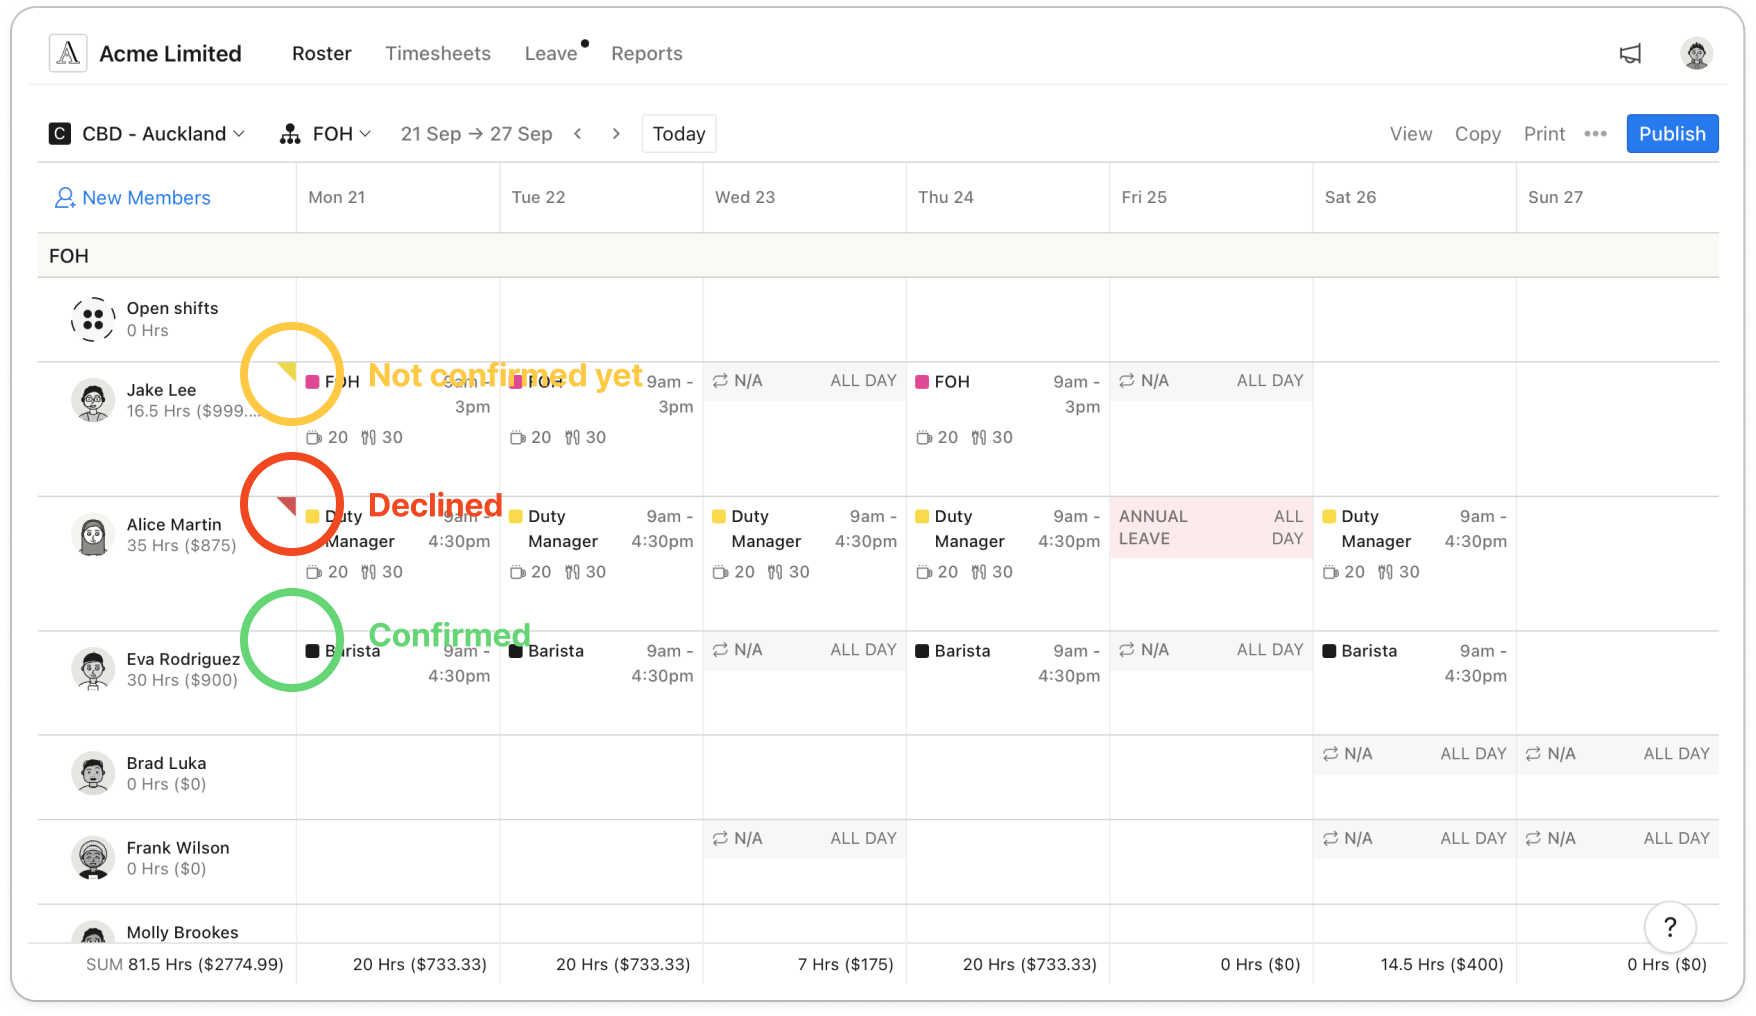
- On the Roster, look for a small coloured corner beside each member's name. Point at it to see what it means:
- Yellow, "Not confirmed yet.": at least one of their published shifts has no answer.
- Red, "Declined.": they declined, and no shifts are left waiting for an answer.
- No corner: they have confirmed, or nothing is published for them.
Note: A member who declines in the mobile app must add a note, and their managers get an email with it. A decline from the email link sends no email, so check the roster for red corners. The email links stop working 7 days after you publish.


