.svg)
Turn this on so the Timesheets page shows the start and end date you pick, instead of a Monday to Sunday week.
Turn it on
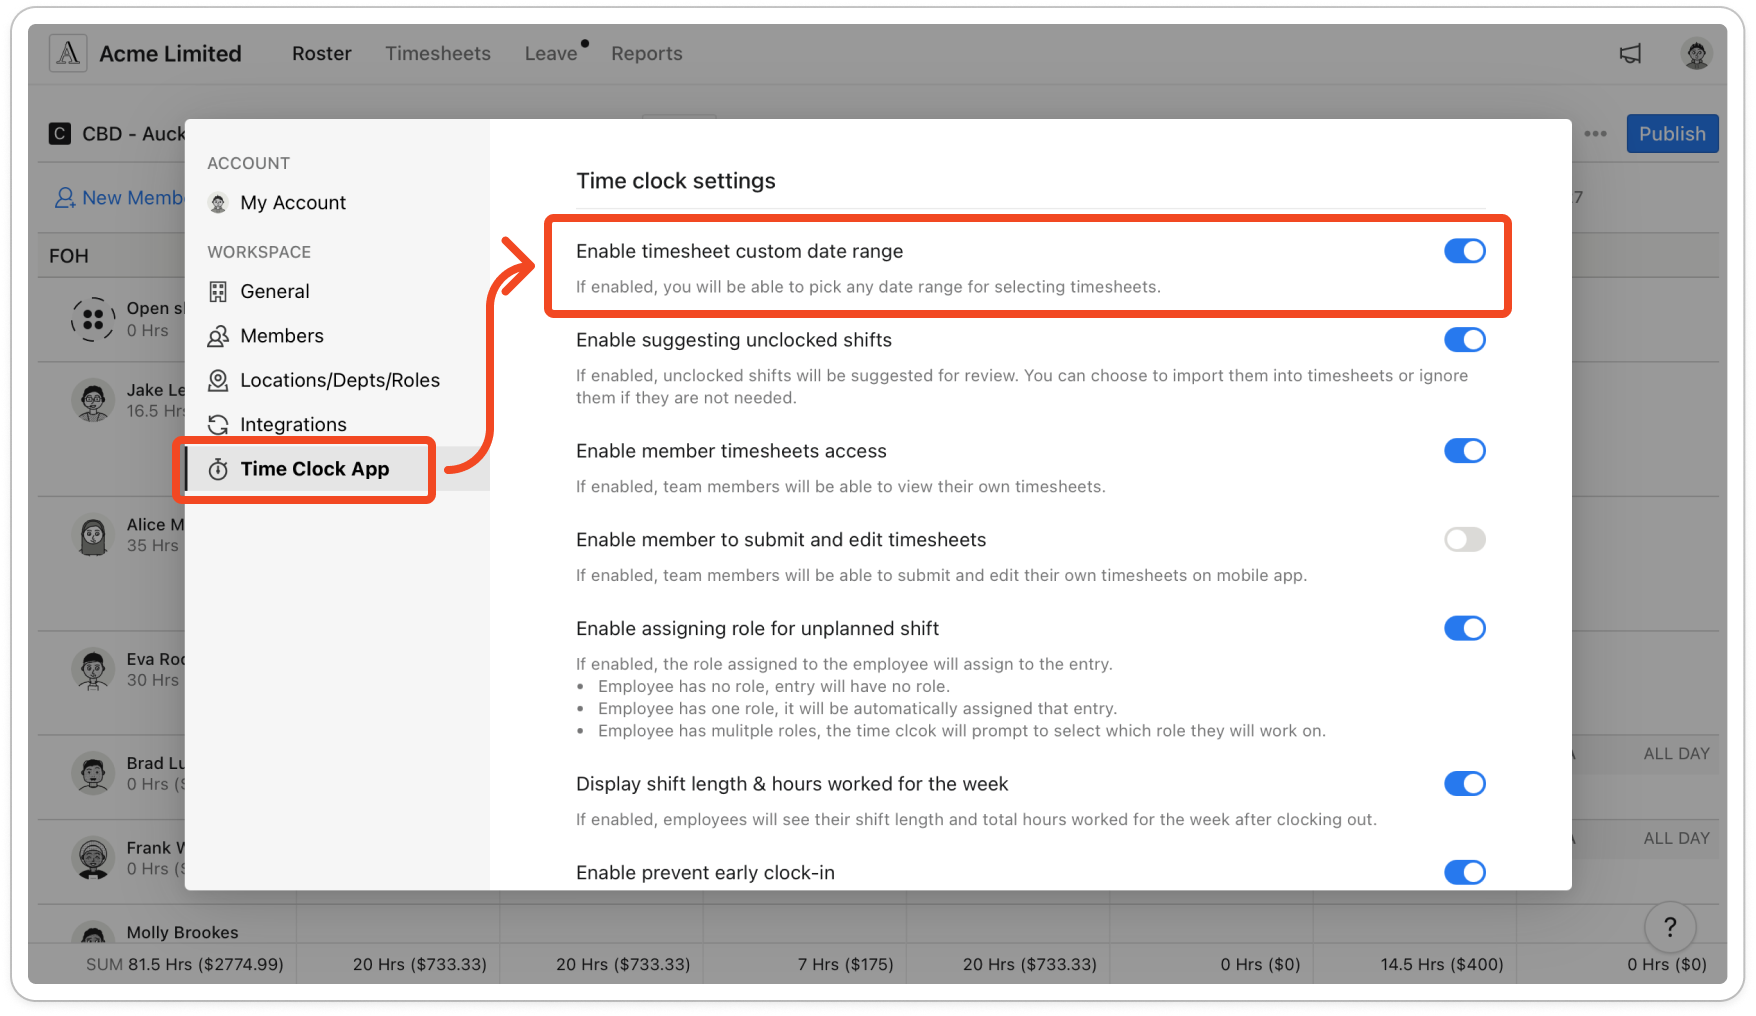
- Click your profile picture in the top right, then click Settings.
- Click Time Clock App.
- Under Time clock settings, turn on Enable timesheet custom date range. It saves straight away.
Note: If the tab shows only an Enable Time Clock App button, the time clock isn't on for your business yet. Turn it on first, then come back to this switch.
Pick your pay period
- Click Timesheets at the top of the page.
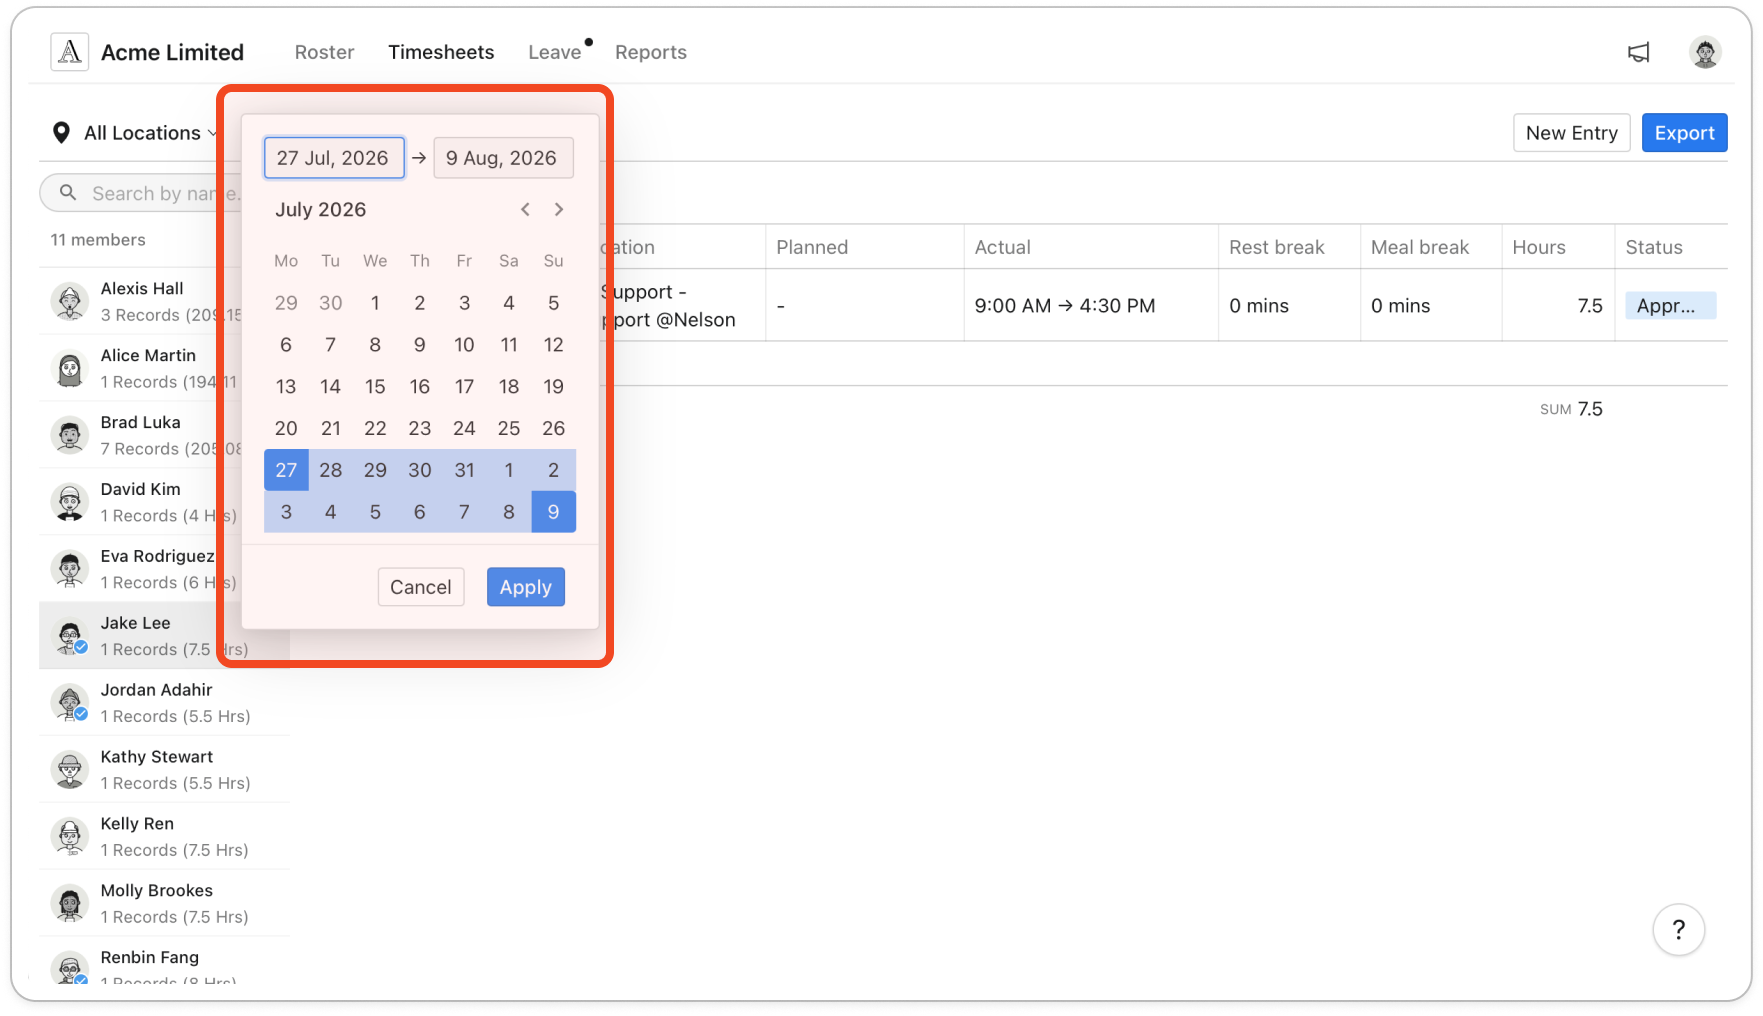
- Click the dates at the top of the timesheet, for example 12 Jun → 18 Jun.
- Click the first date box, then click the first day of your pay period in the calendar.
- Click the second date box, then click the last day of your pay period.
- Check both date boxes, because picking one date can move the other. If either is wrong, click that box and pick the day again. Then click Apply.
- To move to the previous or next pay period, click the arrows next to the dates. Each click moves by the same number of days as your range.
Note: This only changes how you pick dates on the Timesheets page. When you export, CSV, Crystal Payroll, PayHero, PaySauce and Smartly use the dates on screen. Xero and iPayroll use the pay period you choose in the export.


