.svg)
Choose which part of the business the roster shows, how it is laid out, and how many days you see at once.
On the web
Choose the location, departments and dates
- Click Roster in the top bar.
- Click the location name at the top left, then pick a location from Locations of Business.
- Click the departments button next to it and tick the departments you want to see. Each department gets its own block on the roster, and at least one stays ticked.
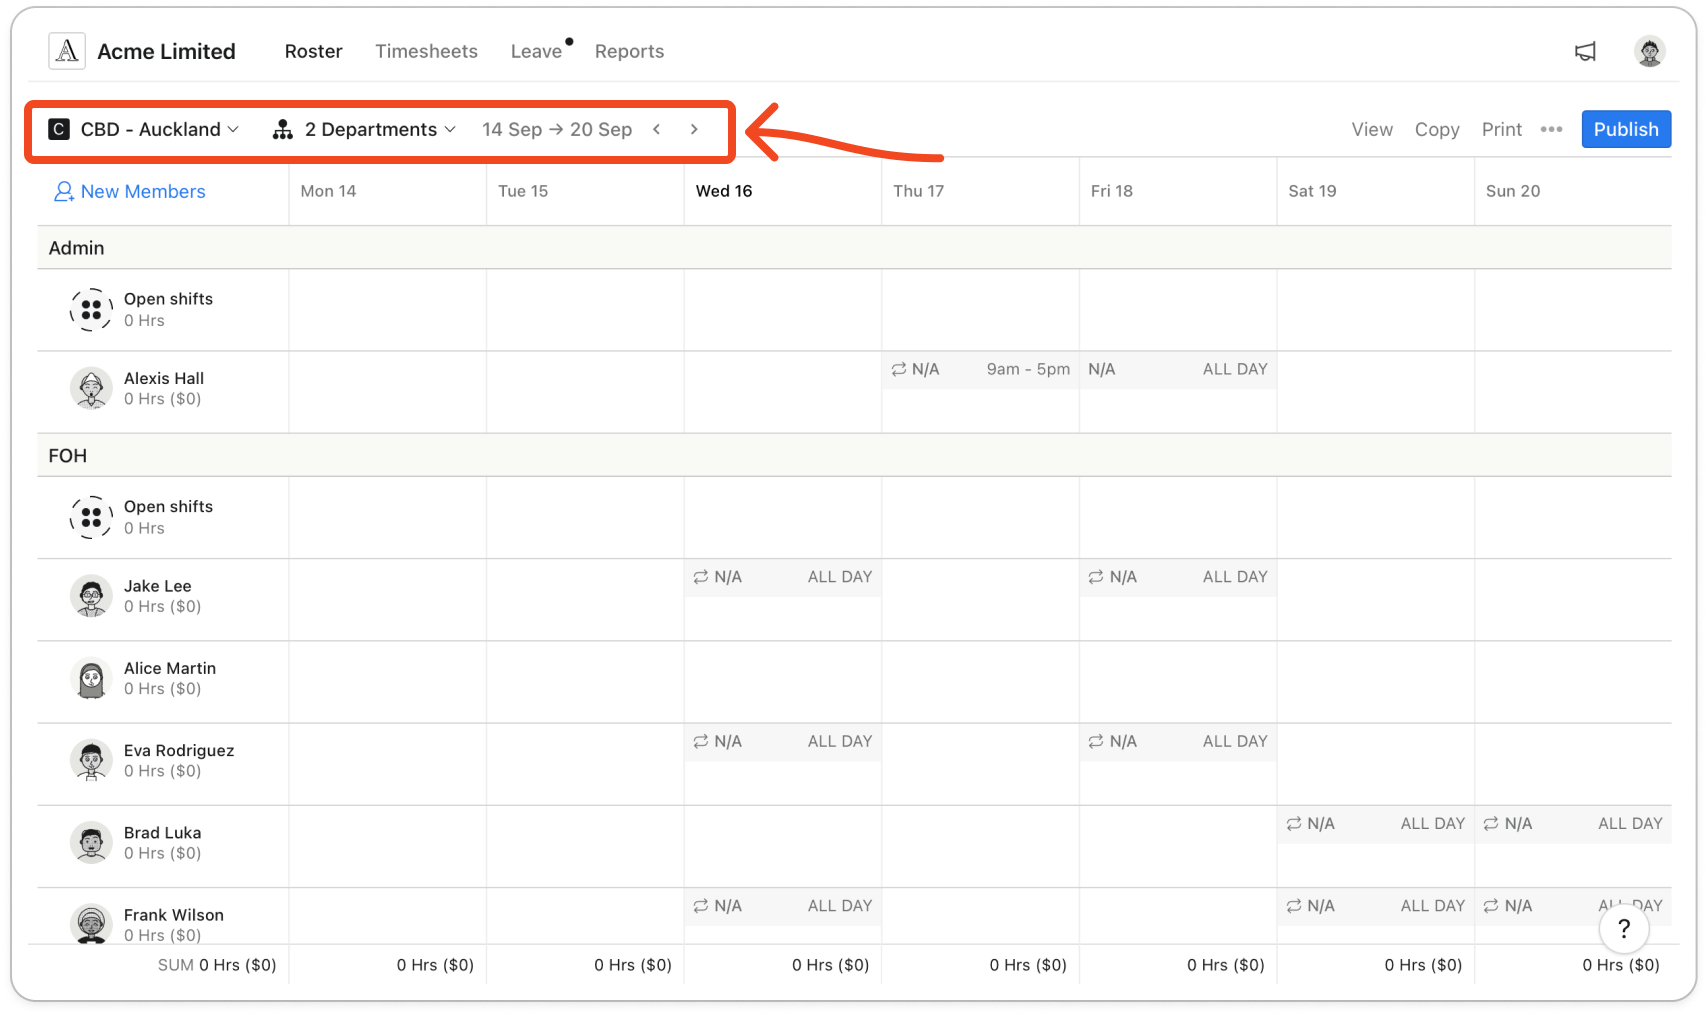
- Use the arrows beside the date range to move back or forward, or click the date range to pick a date. When you have moved away from the current week, click Today to jump back.
Change the view
- Click View in the toolbar.
- Under View by, choose Member or Role.
- Member gives each member their own row.
- Role puts a heading for each role, with its members underneath. A member with two roles appears under both. Members without a role sit under No role.
- Under Date type, choose Weekly or Fortnightly. Role view is Weekly only.
Note: In Fortnightly, the Copy menu offers only Copy shift to next 2 weeks, and roster templates are only available in Weekly.
- Under Display options, turn on the extra details you want on each shift, such as breaks, shift notes or daily notes.
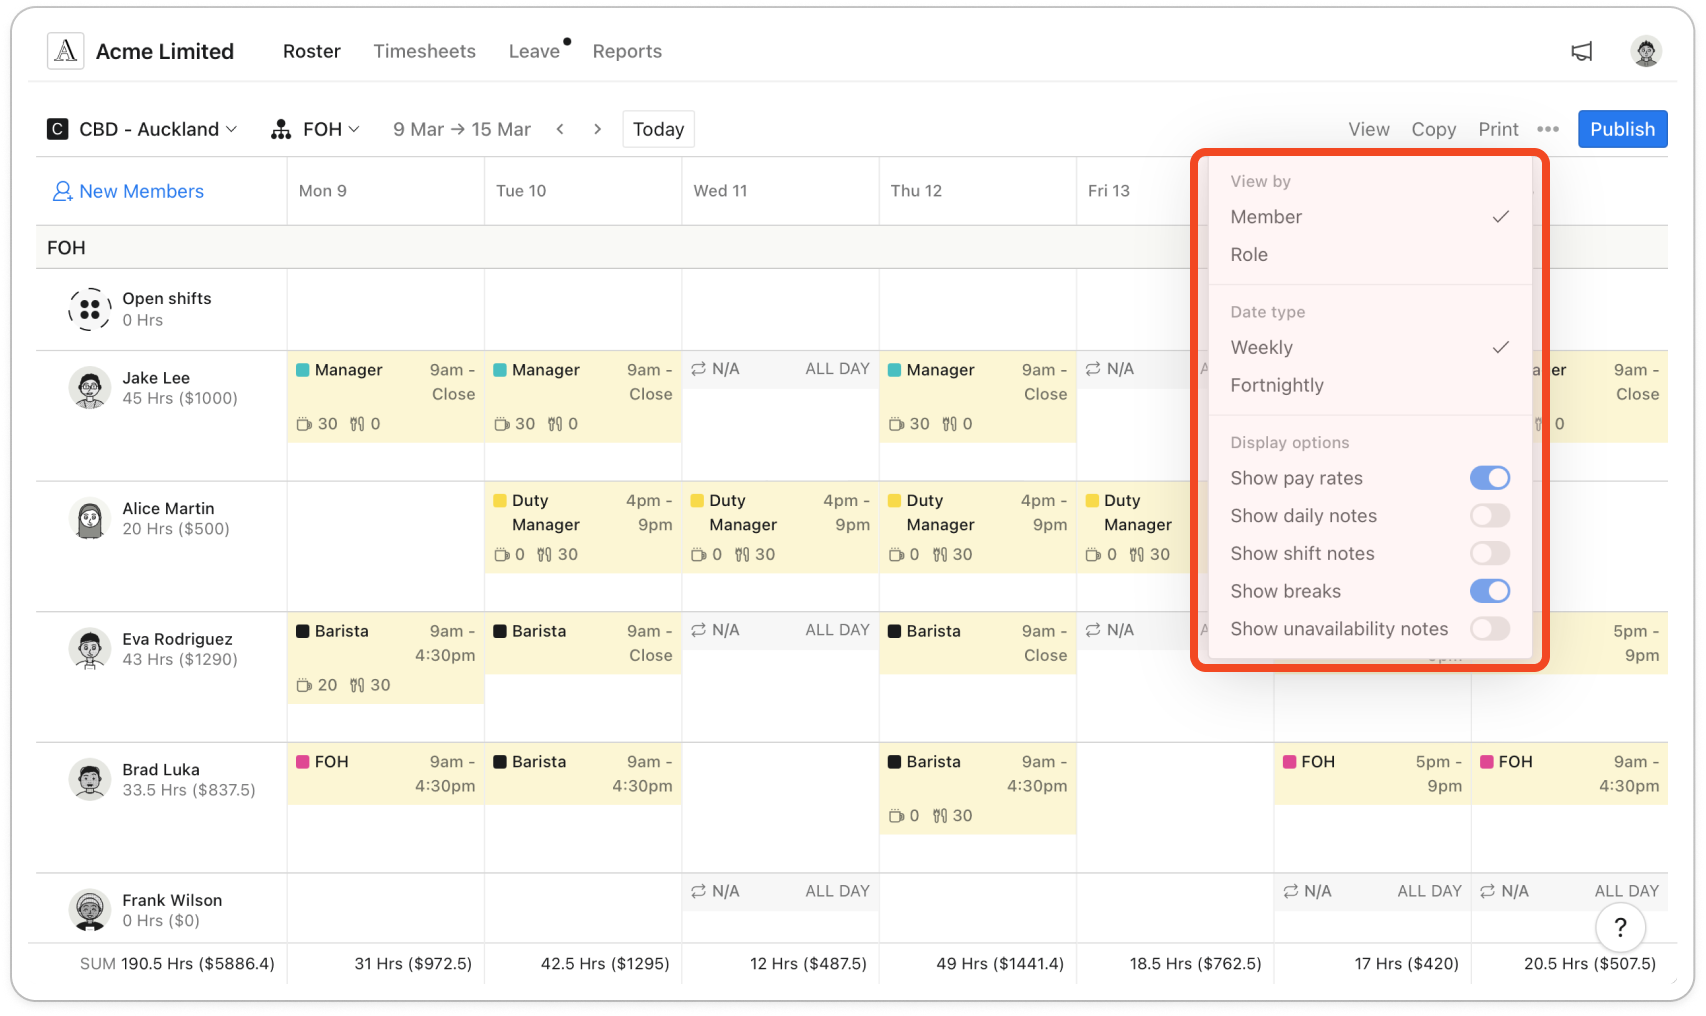
Note: Switching between Member and Role sets the dates back to Weekly. Timble remembers your view on this browser, but not on another computer.
Read a day on the roster
Under a member's shifts, a day can also show:
- Leave: the leave type, or LEAVE, with the time or ALL DAY. A request still waiting for approval starts with PENDING. Declined requests are not shown.
- N/A: the member is unavailable, with the time or ALL DAY.
- AVAIL: the member has said they are available, with the time or ALL DAY.
On your phone
The phone shows one week as a list of days, and has no Member, Role or Fortnightly view.
- Tap Roster.
- Tap a day in the strip at the top to jump to it, or tap the month at the top to pick another date.
- Tap the filter button below the days. It shows what you are looking at, such as a department and its location.
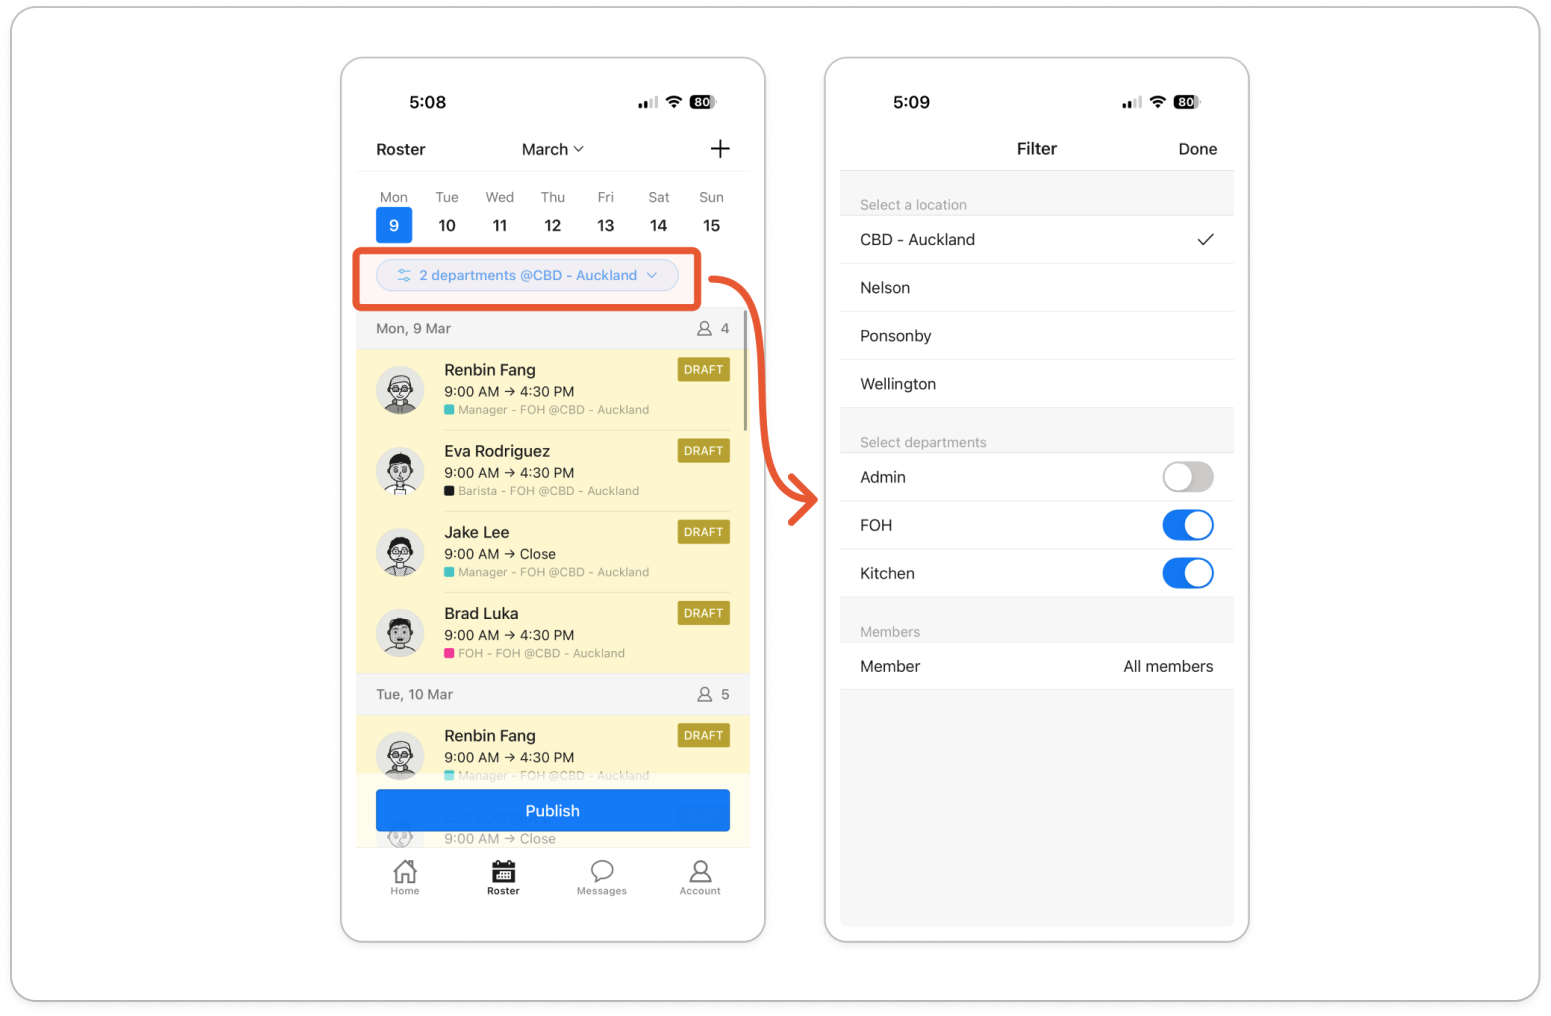
- Under Select a location, pick a location. Under Select departments, turn on the departments you want. At least one stays on.
- To see one person's shifts, tap Member and pick them. Leave it on All members to see everyone.
- Tap Done.


