.svg)
Submit your own leave request and choose the person who approves it.
On the web
- Click Leave at the top of the page. The Requests page opens.
- Click New leave.
- Check that Member shows your name. If the field is a list, pick yourself.
- Set the From and To dates. A row appears for each day in the range.
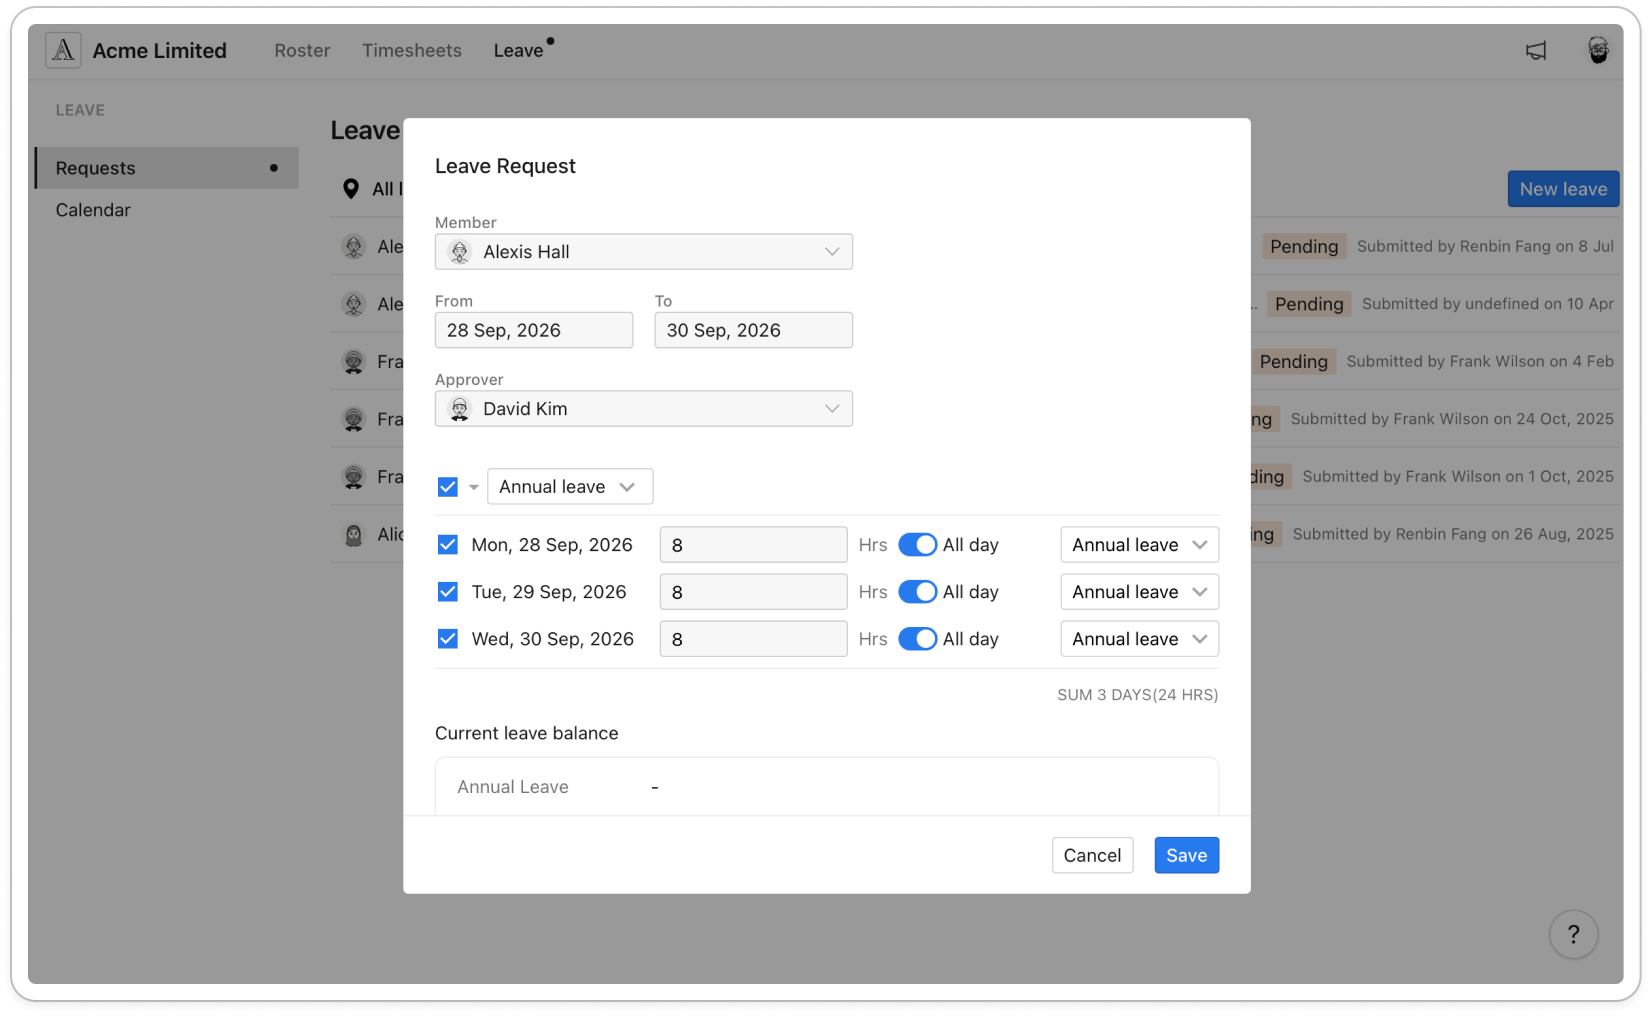
- Under Approver, click Select an approver and choose a name from the Available Approvers list. If the right person isn't there, ask your admin.
Note: If your business has set you up to approve your own leave, there is no Approver field. The request is saved as approved when you click Save.
- Each day starts as Not working days. Click the type at the end of a day's row to change it, or tick the days and click Assign leave type to set them all at once.
- For a paid or unpaid type, enter the Hrs for the day. To enter start and finish times instead, turn off All day.
- Add a note if you want, then click Save. Your request appears in the list as Pending, and the approver you chose is emailed.
Note: The approver can't be changed once the request is submitted. To send it to someone else, delete the request and submit a new one.
On your phone
- Tap Account, then tap Leave.
Note: If you can't see Leave on the Account screen, your business hasn't turned on leave requests in the mobile app. Use the web app instead.
- Tap the plus icon in the top right.
- Tap Leave type, choose a type, then tap Done.
- Tap Approver. On the Choose approver screen, pick a name under Send to, then tap Done. If the right person isn't there, ask your admin.
- Leave All day on and set Starts and Ends. A row appears for each day so you can adjust the hours. For part of a day, turn All day off and set the Date and Time instead.
- Add a note if you want, then tap Submit. Your request appears on the Leave screen as Pending, and the approver you chose is emailed.
Note: The approver can't be changed once the request is submitted. To send it to someone else, delete the request and submit a new one.


