.svg)
Print a week of the roster to put up on the wall, save it as a PDF, or email it to your team.
Print or save a PDF
- Click Roster at the top of the web app and choose the location.
- Click Print in the toolbar. A preview of the printed roster opens, with its settings on the right.
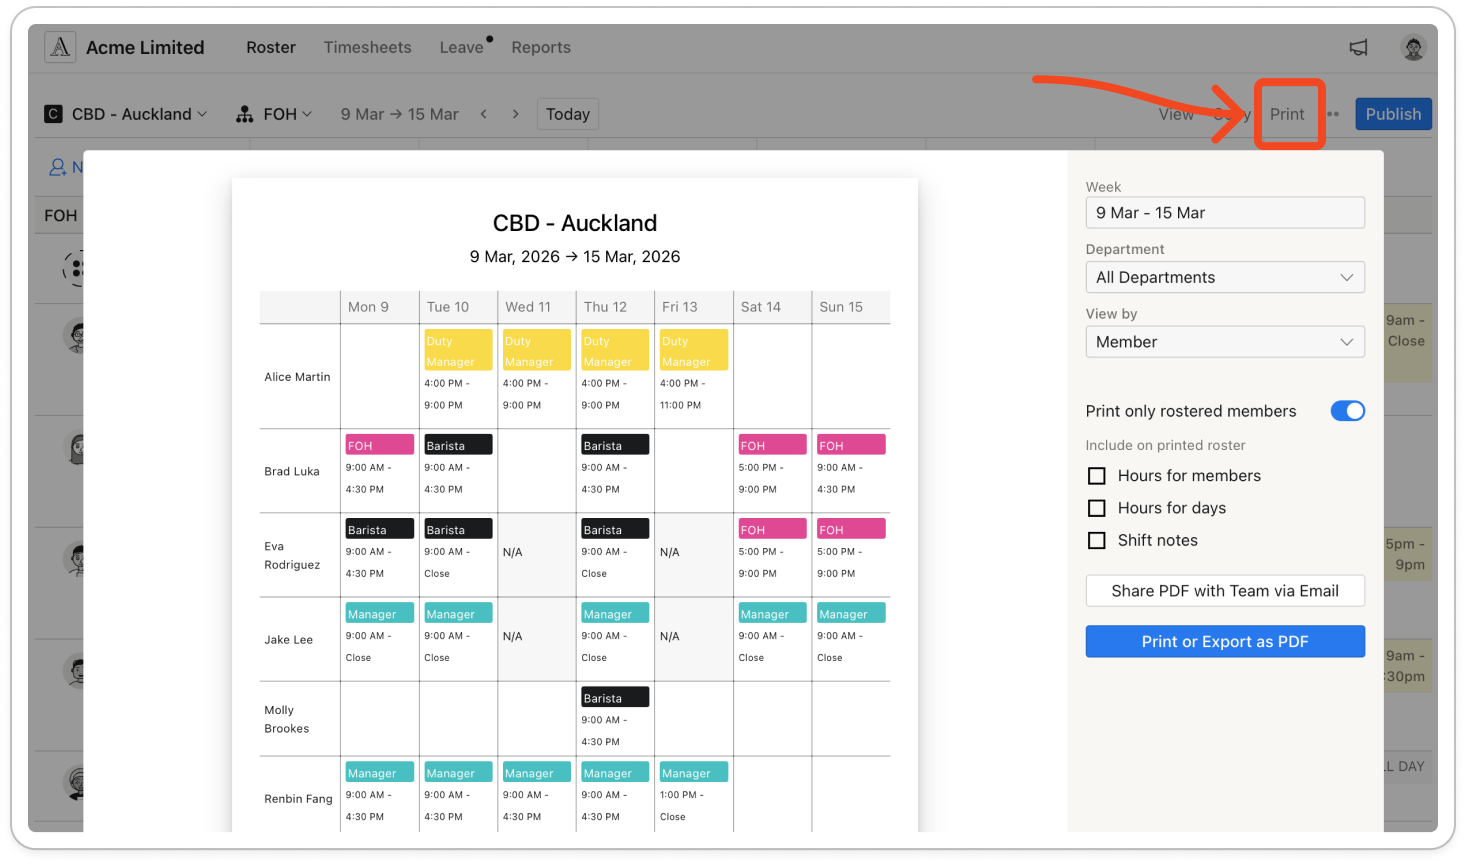
- Under Week, pick the week you want to print. The printout always covers one week.
Note: If you're in the fortnightly view, the preview opens on the first week of the fortnight. Change Week to print the second.
- Under Department, keep All Departments or choose one department.
- Under View by, choose Member to list shifts by person, or Role to group them under each role.
- Leave Print only rostered members on to skip members with no shifts that week. Turn it off to list everyone.
- Under Include on printed roster, tick what you want to add. Hours for members shows each person's total hours beside their name, Hours for days adds a row of daily totals, and Shift notes prints the note on each shift. The preview updates as you go, and the web app remembers your ticks on this computer.
- Click Print or Export as PDF. Your browser's print window opens. Choose a printer, or choose your browser's option to save as a PDF.
Note: The printout also shows approved leave, unavailability (as N/A), and public holidays if you show them on the roster. Daily notes for the week are listed under Notes: at the bottom. Shifts you haven't published yet are printed too, so publish the roster first if the printout needs to match what your team sees.
Email the roster to your team
- Set up the preview as above, then click Share PDF with Team via Email.
- Under Share roster with team members, tick the members to send it to, or tick the box beside Selected 0 members to select everyone. The list shows the members of the department you chose. With All Departments, an admin sees everyone in the location's departments, and a manager sees the members of their own departments.
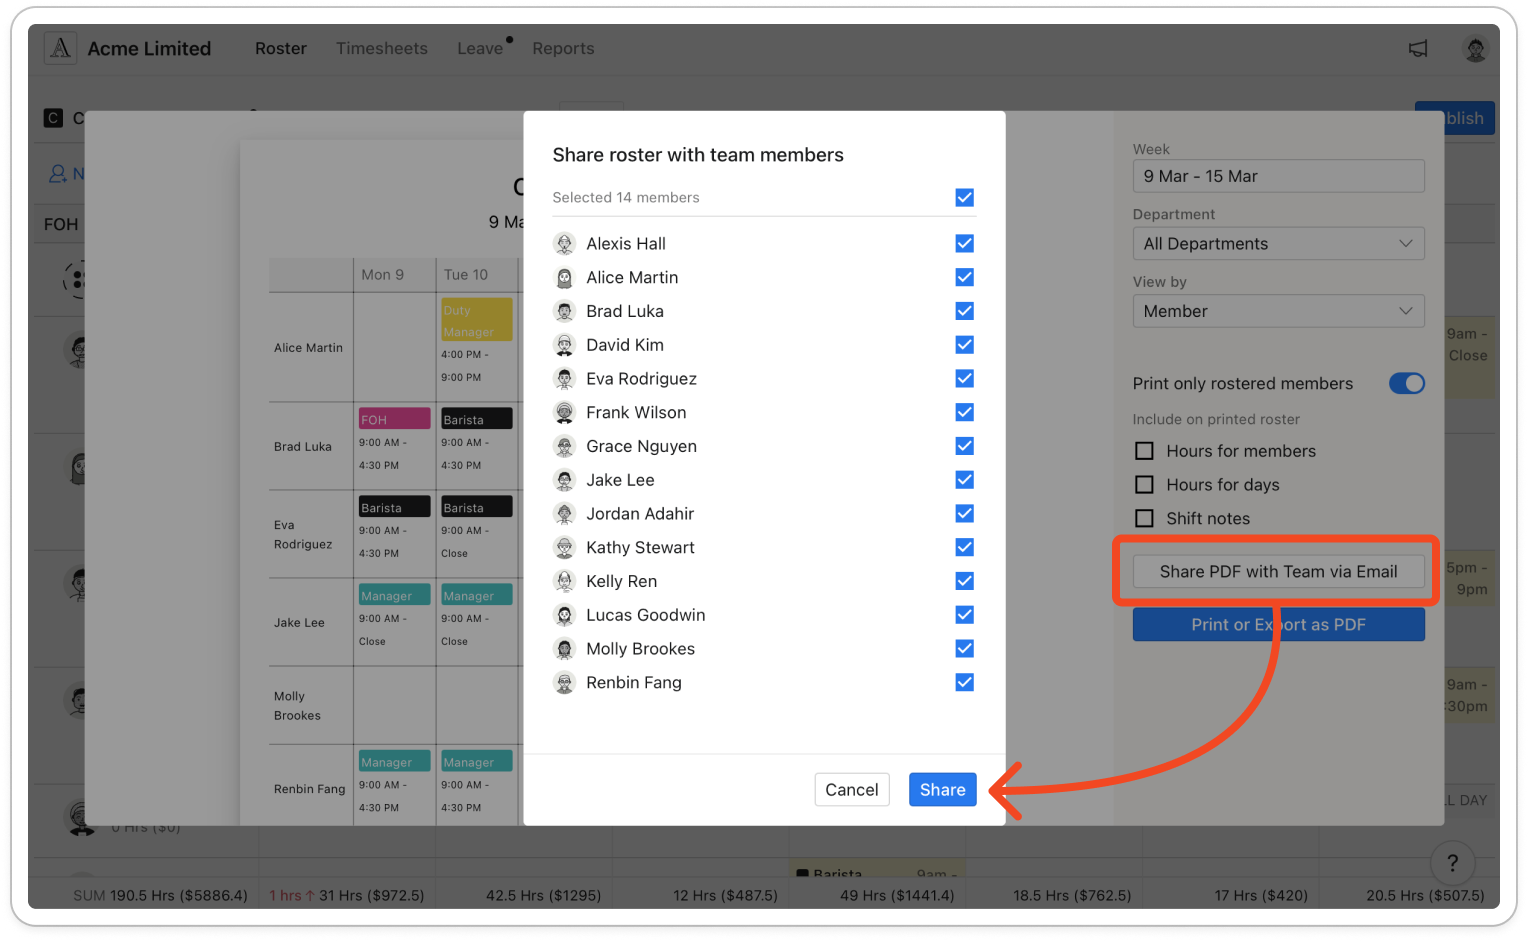
- Click Share. Timble shows "Shared with team successfully."
Note: Each member you picked gets an email with the roster attached as a PDF, matching the preview. Members marked (No Email) have no email address in Timble and are skipped. If none of the members you picked has an email address, nothing is sent and the window closes without a message.


