.svg)
Move your business to a higher or lower Timble plan from the Billing tab.
How Timble plans work
Your business has one plan, and it covers every active location. The price is set per location, and you choose whether to pay monthly or annually. New businesses start on a free trial.
There are three plans: Essentials, Business and Business Plus. What each plan includes and what it costs change from time to time, so you'll find the current details at timble.co.nz/pricing.
Choose a new plan
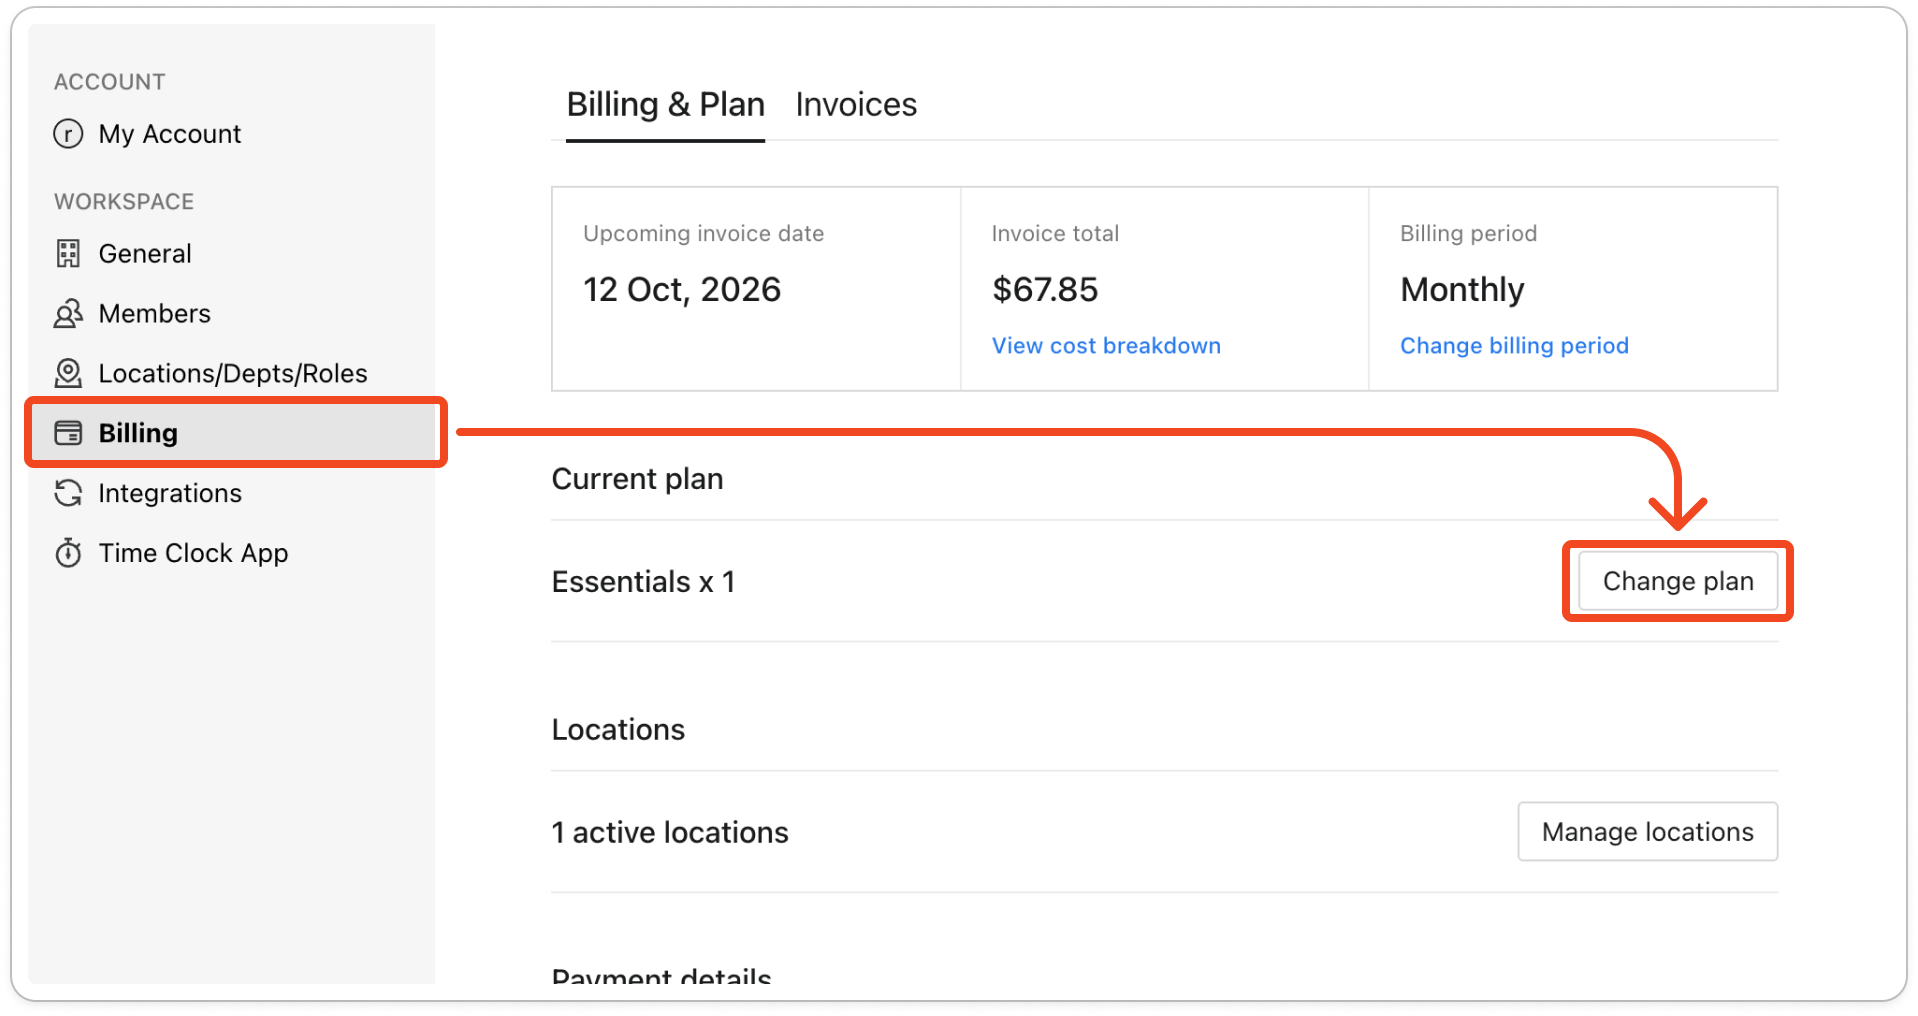
- Click your profile picture in the top right, then click Settings.
- Click Billing on the left. The Billing & Plan tab opens.
Note: If the tab says "Your account is on manual billing.", there is no Change plan button. Email support@timble.co.nz to change your plan.
- Under Current plan, click Change plan.
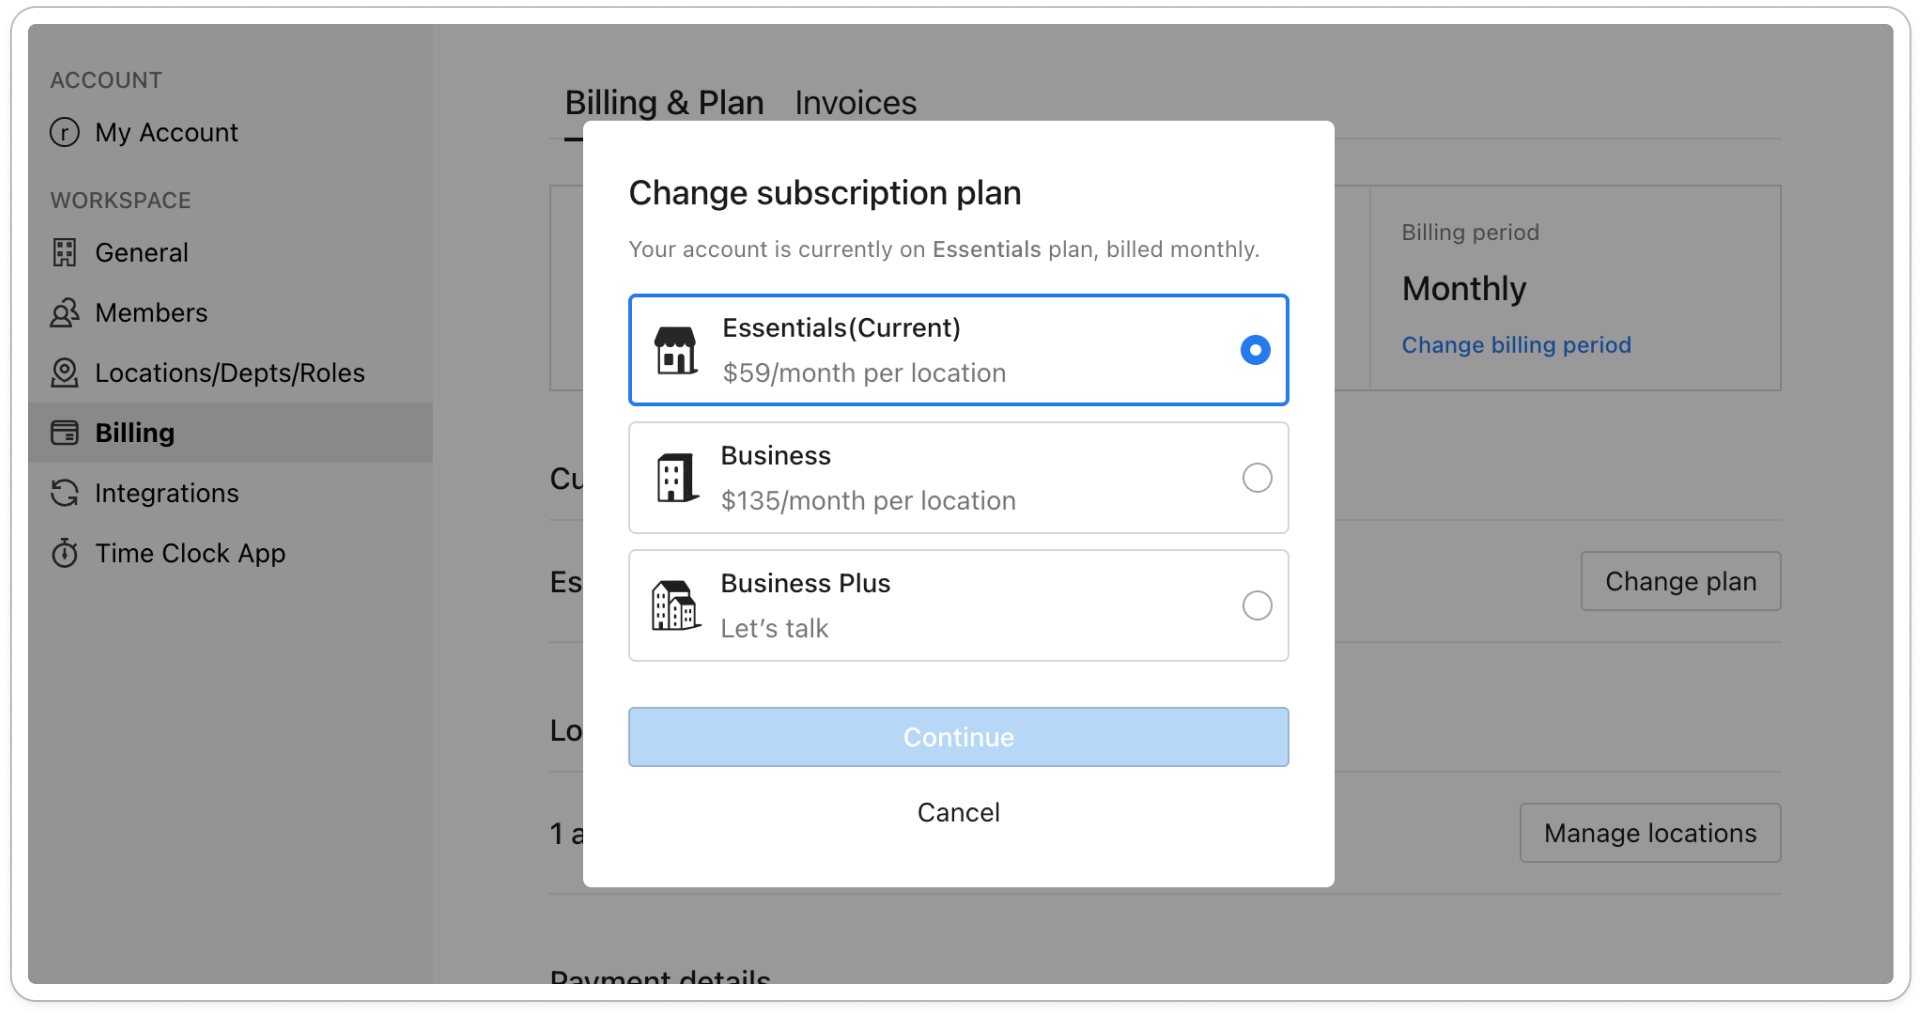
- In the Change subscription plan window, select the plan you want. Each plan shows its price per location for your billing period, and your current plan is marked (Current).
- Click Continue. What happens next depends on whether the new plan is higher or lower than the one you're on.
If you're upgrading
- Timble shows an order summary headed Upgrade to and the plan's name. Check the payment method, the date the upgrade takes effect, and the total including GST.
- Click Pay & activate now.
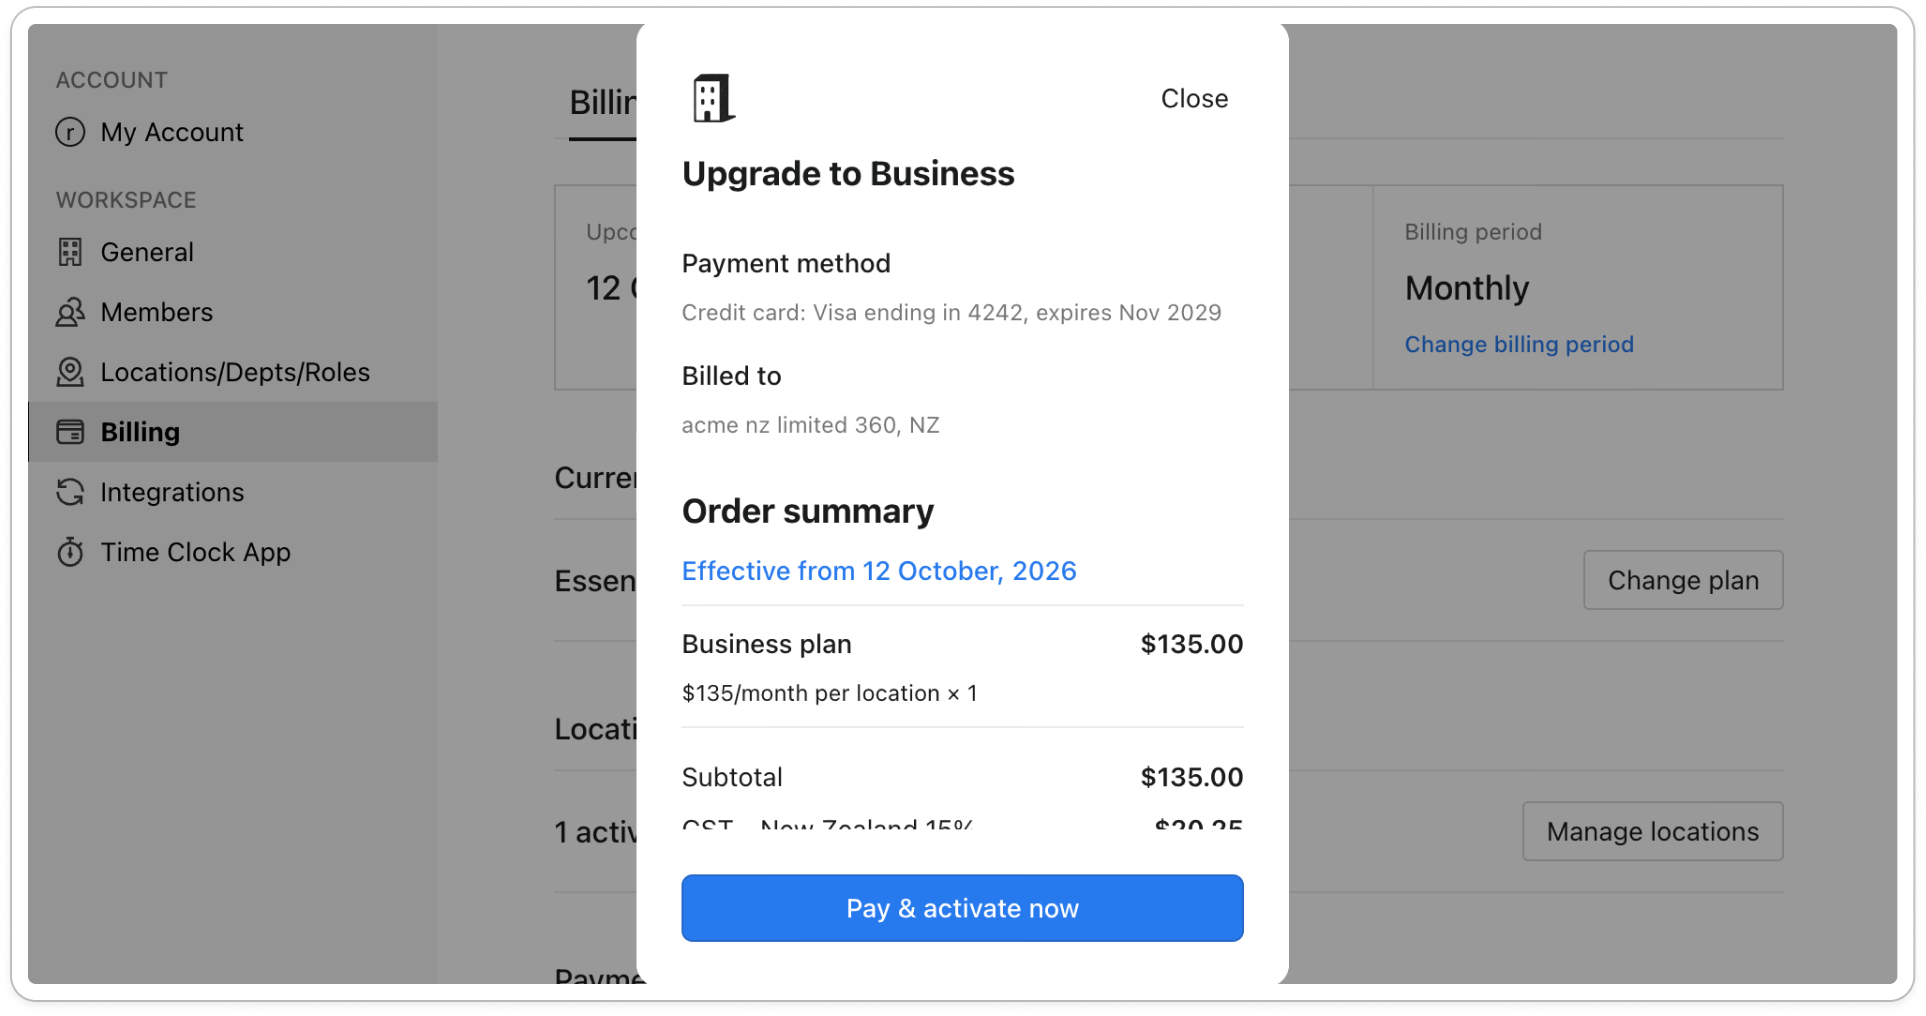
Note: Once your free trial has ended, the upgrade starts straight away and the total shown is charged to your payment method.
If you're downgrading
- Timble shows Downgrade to the and the plan's name, with a list under What you'll lose with the downgrade. Read the list before you go on.
- Click Downgrade. To keep your current plan instead, close the window without clicking Downgrade.
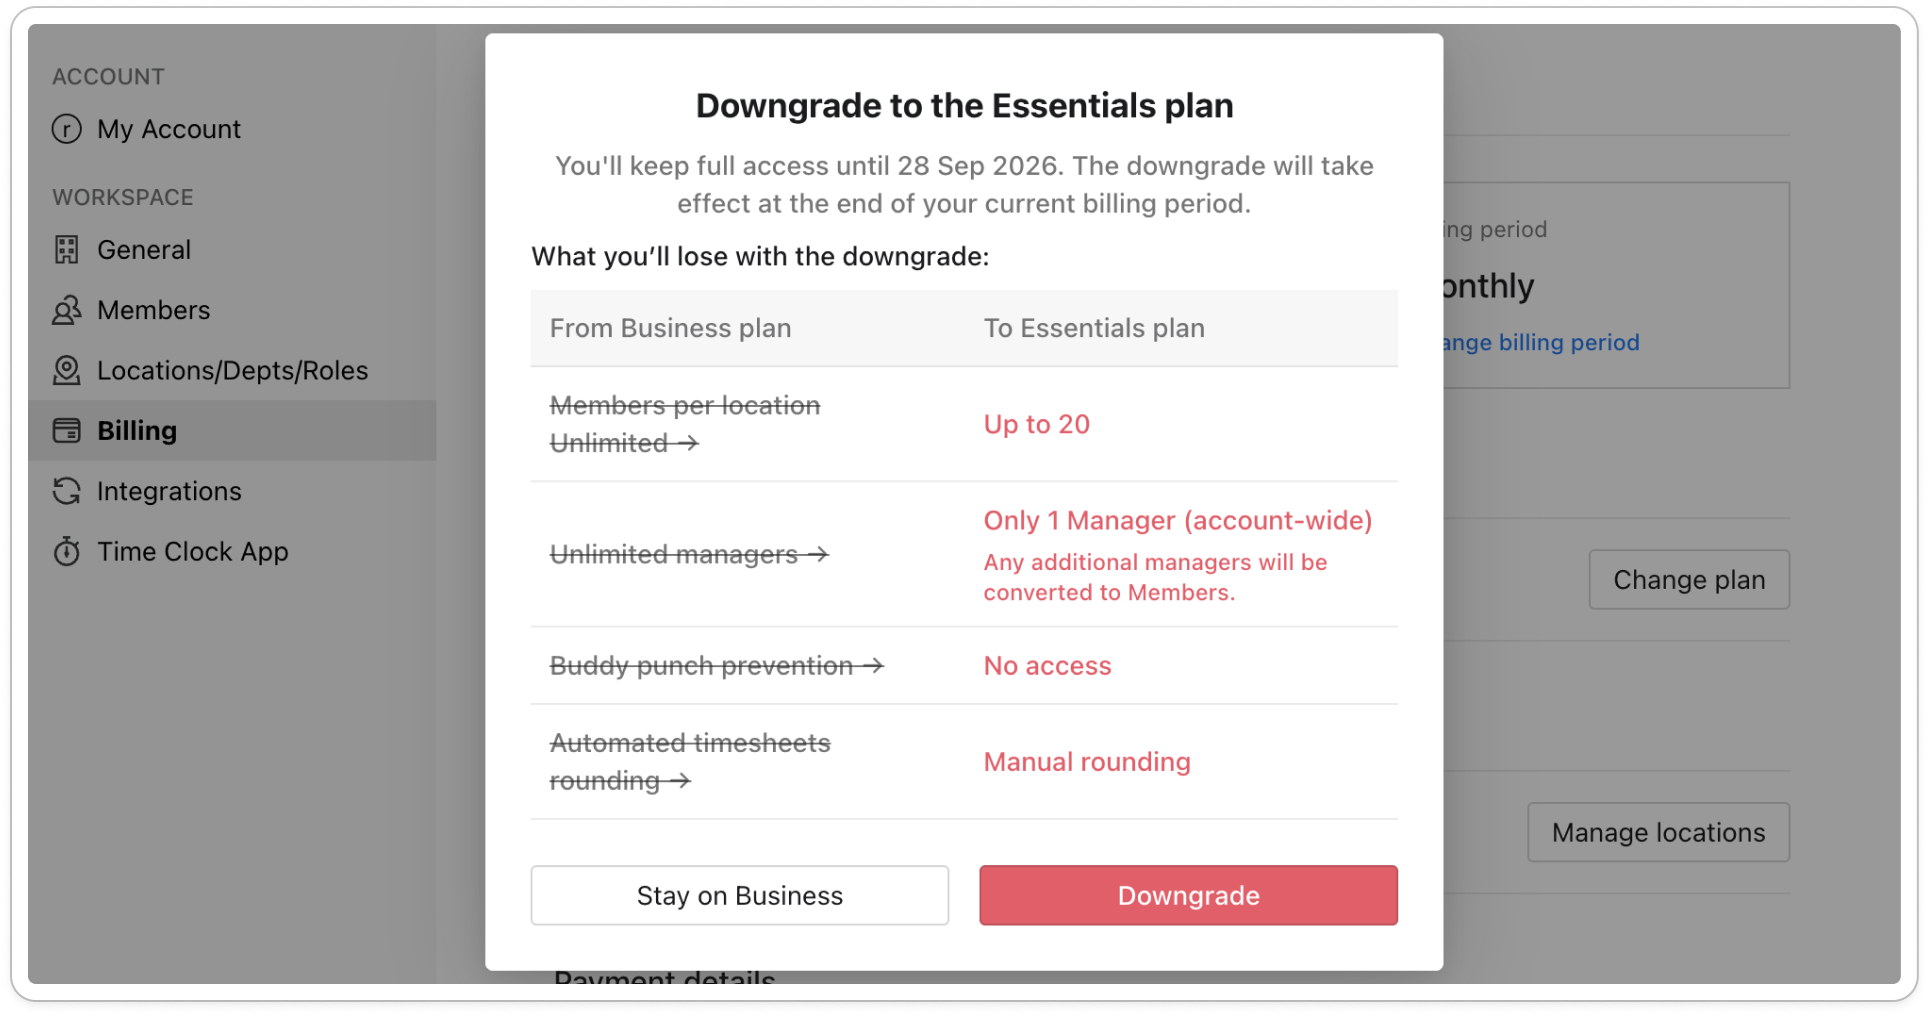
Note: You keep everything in your current plan until the end of the billing period, and the lower plan starts after that. During a free trial, the downgrade takes effect straight away.
If you choose Business Plus
Business Plus shows "Let's talk" instead of a price. When you click Continue, a window explains who the plan is for. Click Book a demo to contact the Timble team, or email support@timble.co.nz.
When a setting shows a plan badge
Some settings show a small blue badge beside their name. The badge shows the name of a plan, or the words Upgrade Required. It means the feature isn't included in your current plan. Click the badge to see what the upgrade costs, and upgrade from there.


