.svg)
Choose where a member manages first, then set what they can do there.
- Click your profile picture in the top right, then click Members.
- Click the member's name to open their profile.
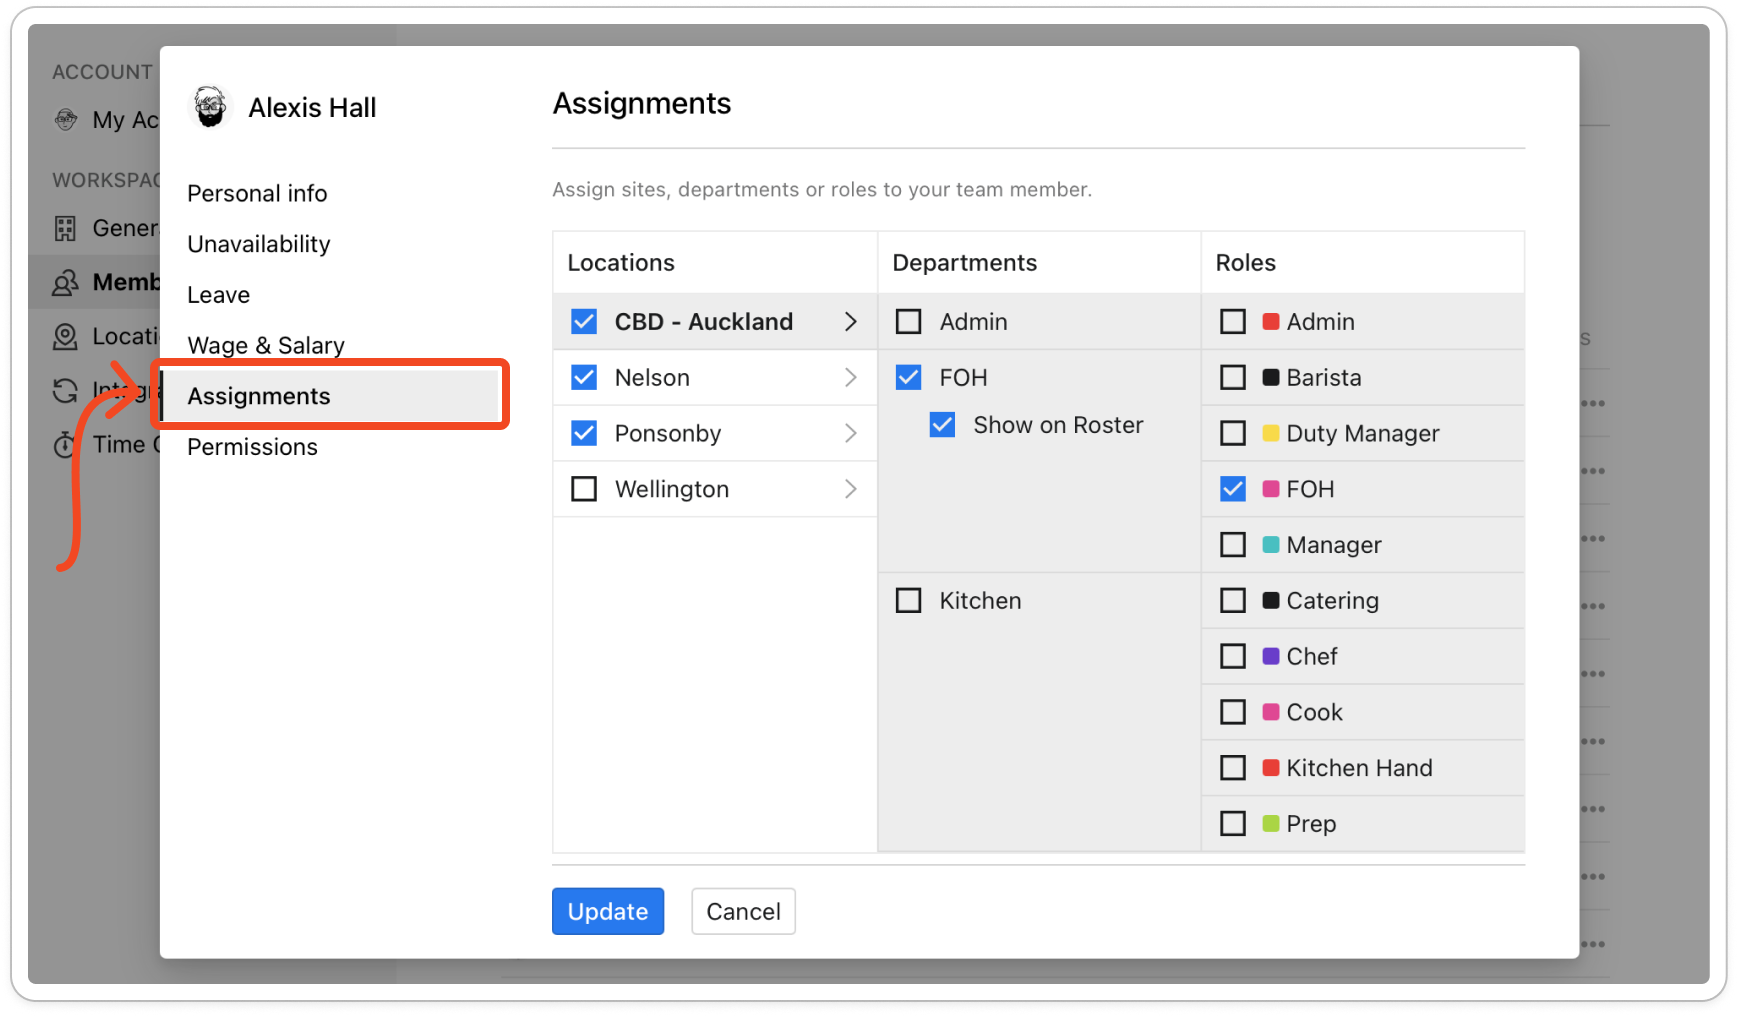
- Click Assignments in the list on the left. Tick every department they will manage, untick any they shouldn't, then click Update. The profile closes.
Important: A manager or duty manager manages every department ticked here.
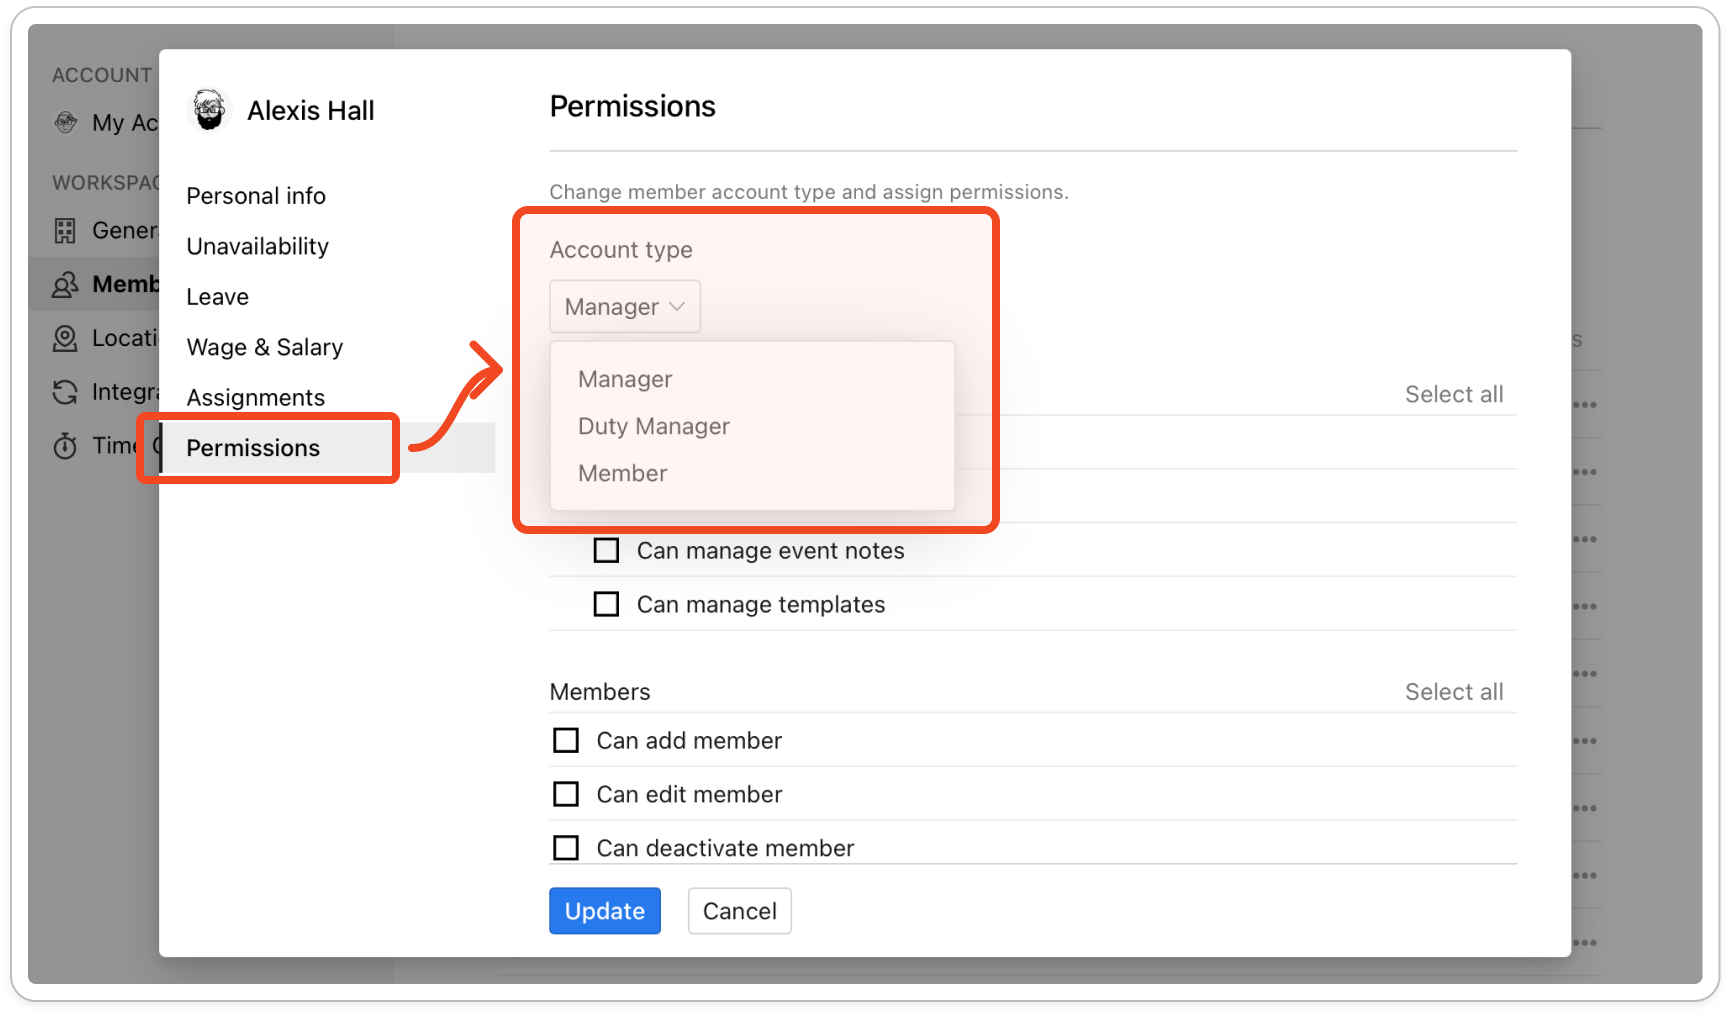
- Click the member's name again, then click Permissions.
- Under Account type, click the current type and choose Manager or Duty Manager. To take management access away, choose Member instead.
Note: Admin is not in the list. You can't make a member an admin from their profile.
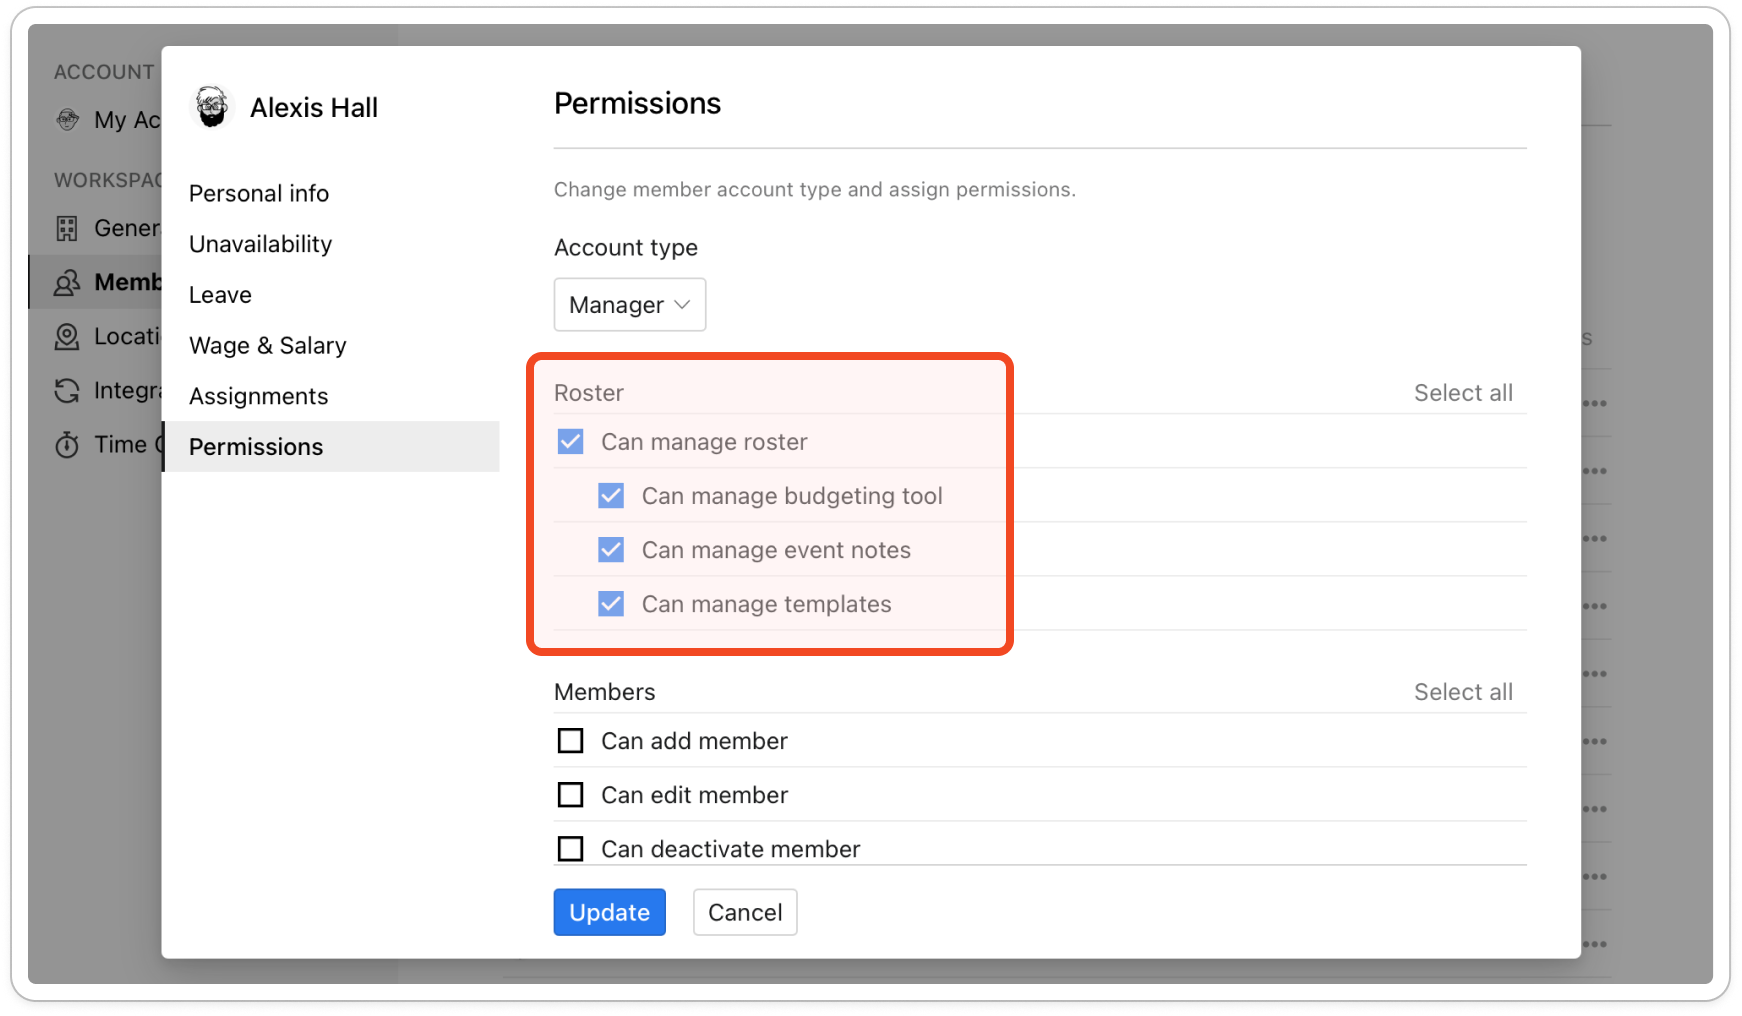
- Tick the permissions the member needs in each group, or click Select all on a group.
Note: Switching between Manager and Duty Manager clears every ticked permission, so tick them again before you click Update.
- Click Update.
Note: Some plans include only one manager, or no duty managers. If yours does, Timble says so when you click Update and offers an upgrade.


