.svg)
Review leave requests from the members you manage, then approve or decline each one.
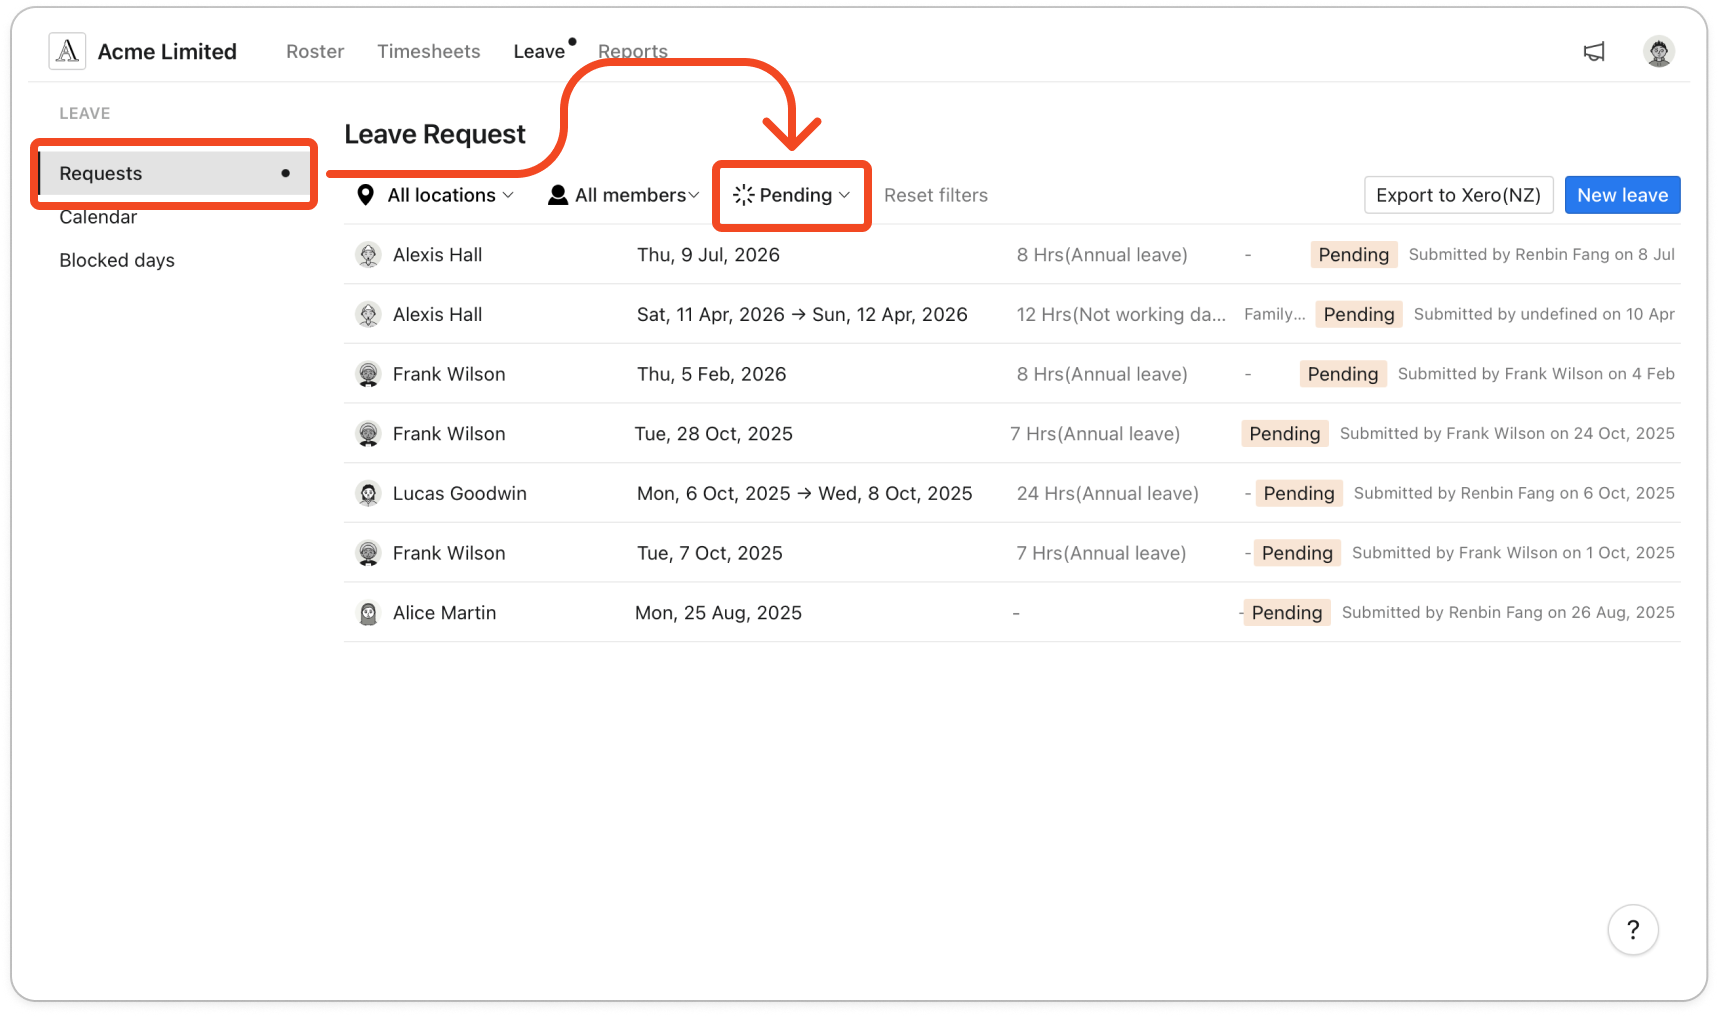
- Click Leave at the top of the page. A small dot on the word Leave means there are requests waiting for you.
- Click Requests in the list on the left. The page opens on Pending requests, so you see only the ones that still need an answer.
Note: If another manager has chosen you as their approver, their requests appear in this list too. Those work differently, and the Approve a manager's leave request guide covers them.
- Narrow the list if you need to. Click All locations to pick a location, All members to pick one person, or Pending to switch to Approved, Declined or All status. Once you pick a location that has departments, an All Departments filter appears as well. Click Reset filters to clear them all.
- Read the request. Each row shows the member, the dates, the hours and leave type, and their note. A long note is cut short, so hover over it to read the whole thing, or click the row to open the full request.
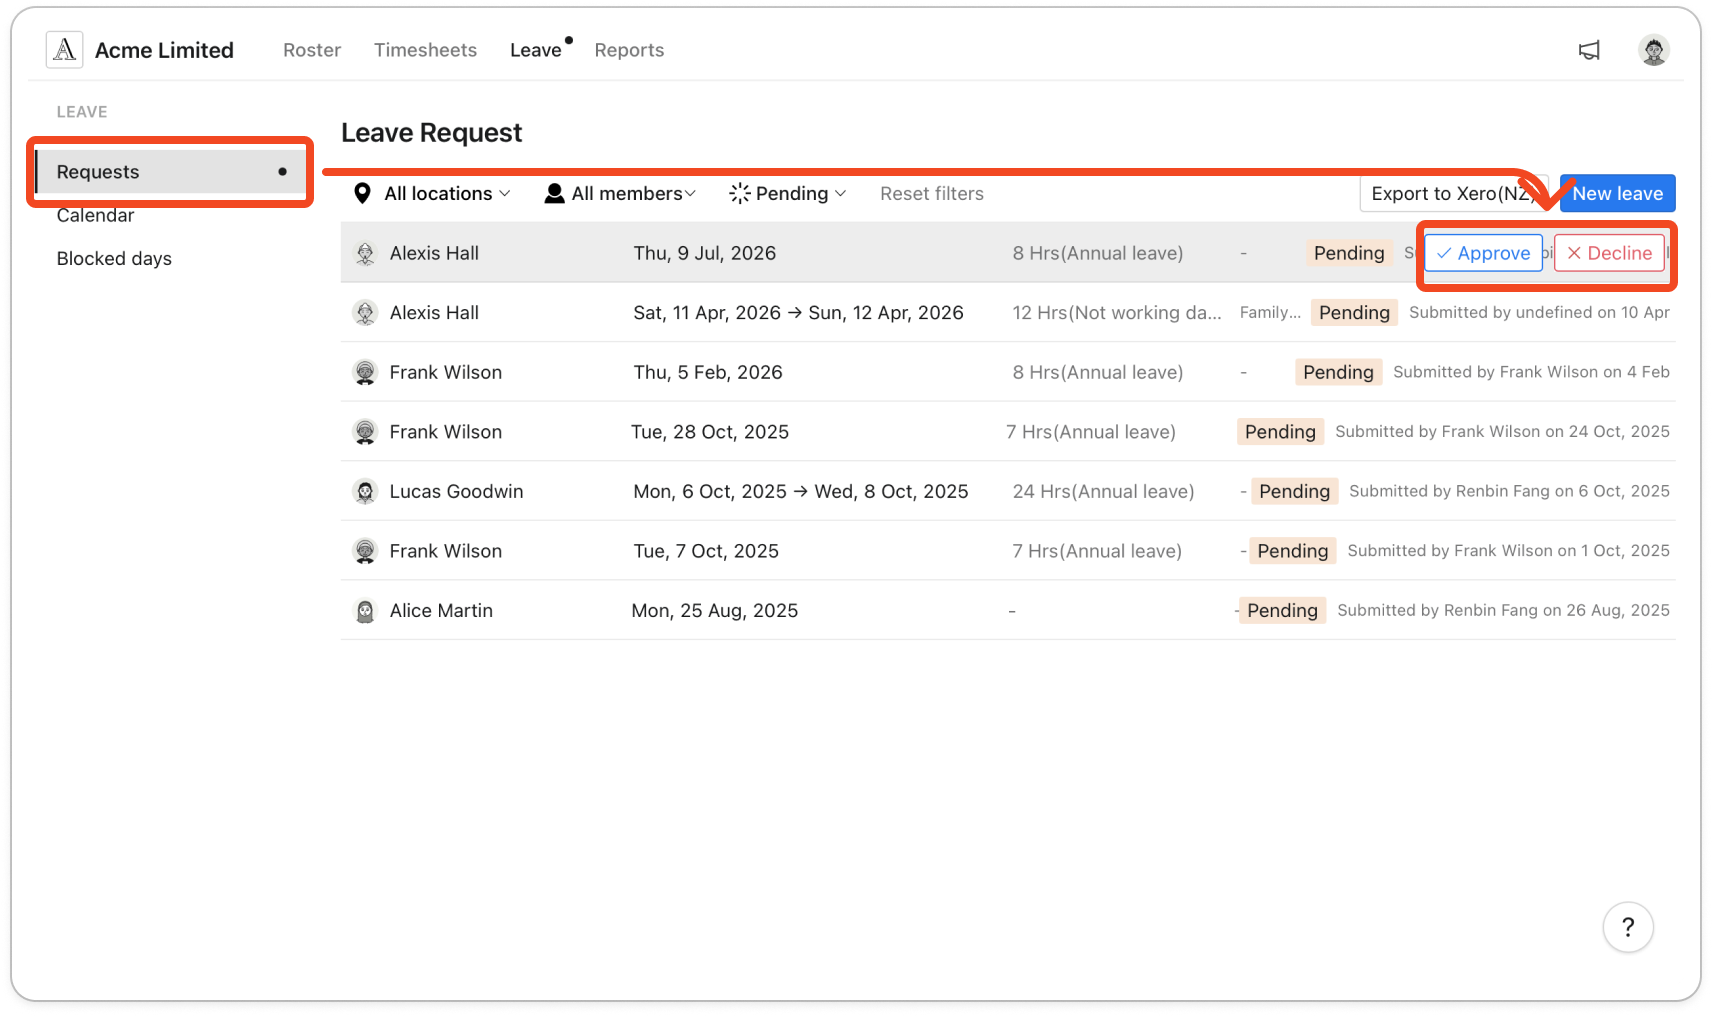
- Hover over the request and click Approve or Decline. The two buttons appear on the right of the row while your mouse is over it.
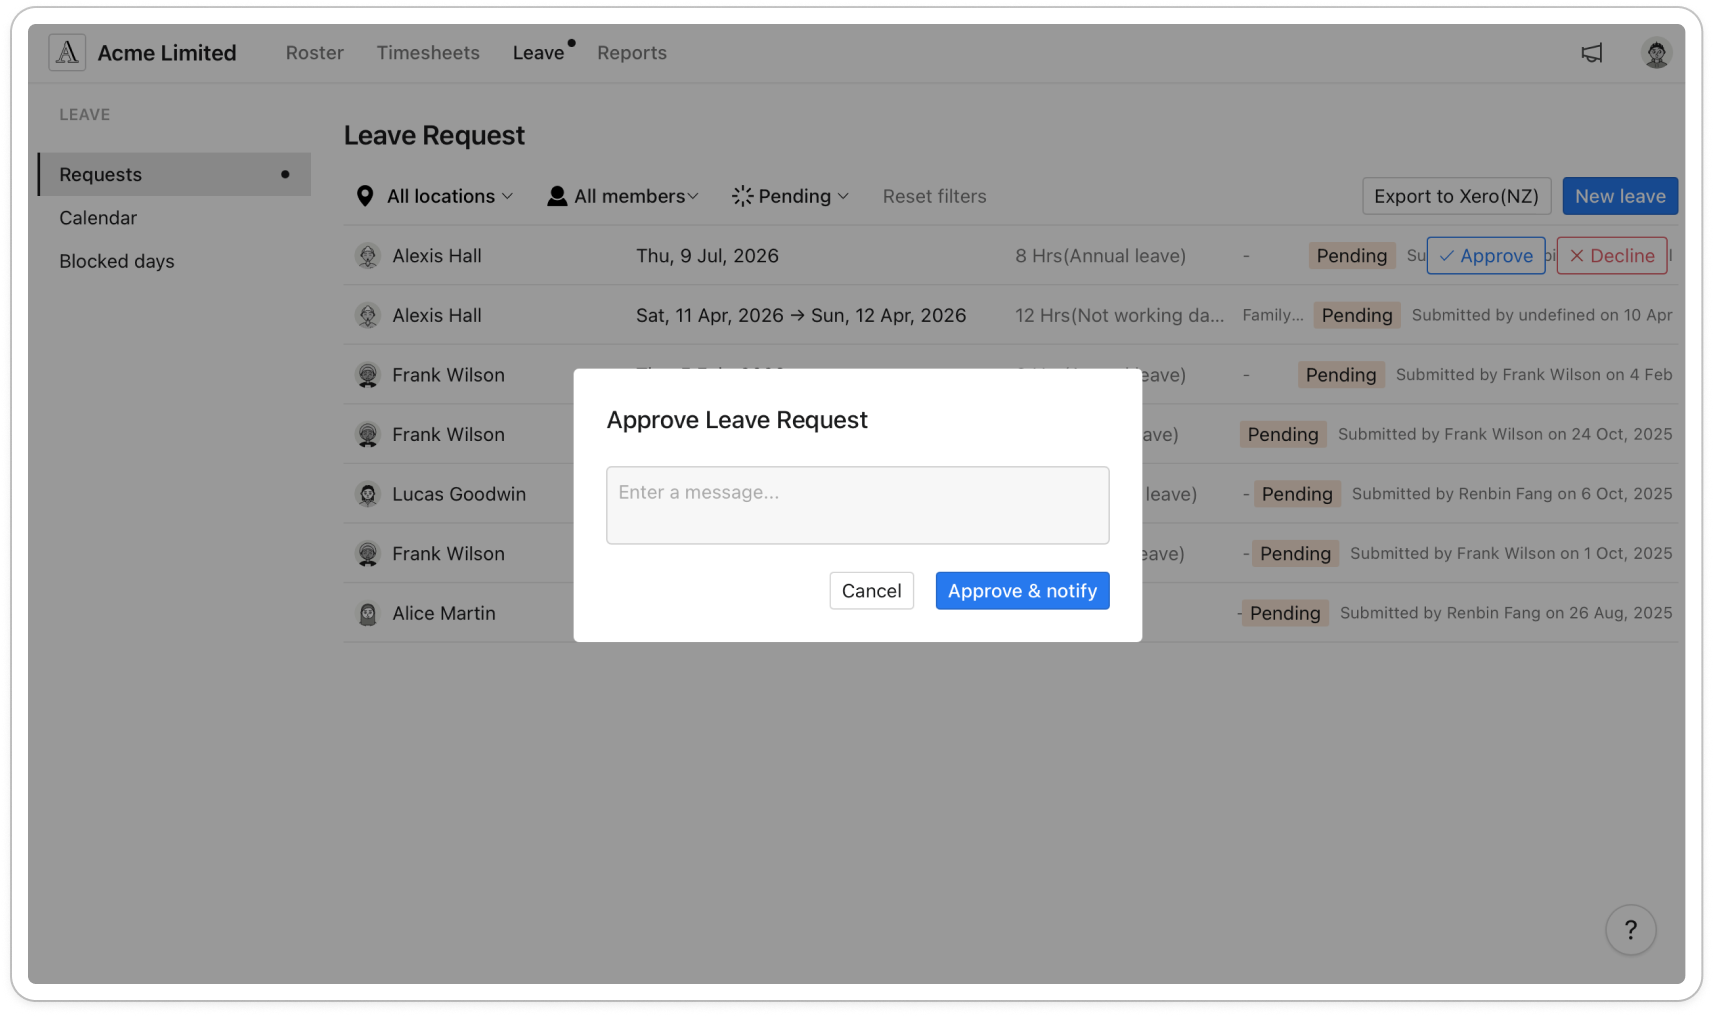
- Type a message for the member in the box if you want to, then click Approve & notify or Decline & notify. The message is optional, and the box can be left empty.
- The request moves out of the Pending list. To see it again, switch the status filter to Approved or Declined. The row now shows who answered it and when.
Note: The member gets a push notification on their phone and an email with the result. If you wrote a message, it is included in the email.


