.svg)
Set up a location for each place your team works, rename one, or delete one you have closed.
Open the Locations tab
- Click your profile picture in the top right, then click Locations/Depts/Roles.
- The Locations tab opens, listing every location with its member count.
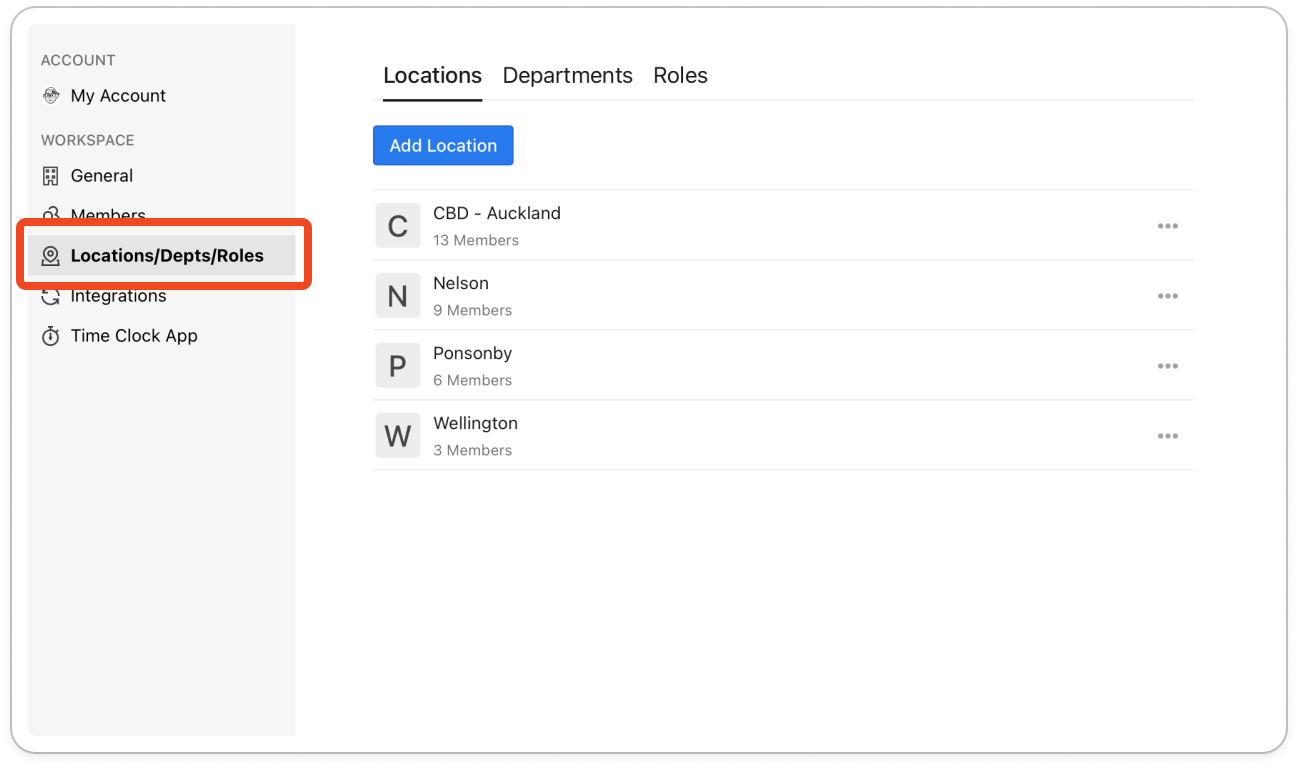
Add a location
- Click Add Location.
- Type a name into Enter location name. Up to 50 characters, and a location can be a separate address or a different area of the same building.
- Click Create Location.
Important: Adding a location changes what you pay. Depending on your plan, Timble asks you to add the new location to your subscription before you can use it. See Billing & subscription.
Edit a location
- Click the location in the list, or click ... on its row and choose Location Settings.
- On the General tab, edit Location name.
- Click Update.
Tip: If you switch tabs or close the window with unsaved changes, Timble asks "Do you want to update your changes?" Click Update to keep them or Discard to drop them.
Delete a location
- Click ... on the location's row and choose Delete Location.
- If members are assigned to the location, pick the location they move to under Members must be migrated to ONE of following location(s).
- Type the location's name to confirm.
- Click Delete Location.
Important: Deleting is permanent. The location's roles, shifts, timesheets and event notes are removed and cannot be recovered. You cannot delete your only location.


